
How to Make A Screw Post Binder

Watch the video below, and then follow this guide to learn how to create an elegant screw post portfolio.
A screw post portfolio is ideal for visual artists like painters and photographers to showcase their work, without compromising the ability to add, remove, and change pages. The number of pages that this binder can hold is limited only by the length of the screw posts, which can be extended to accommodate a growing body of work.
The binder in this guide is a “hidden” screw post portfolio, designed such that the screw posts are hidden by two side strips which fold into each other. A simpler, “exposed” screw post portfolio can also be achieved with this guide, by using only one side strip in each cover. The binder in this guide also features an invisible magnet closure. This sick-ass feature is optional as well.
If you are interested in ordering a custom screw post portfolio from Bounty Archive, contact management for a quote.
Tools:
Bone folder
Rotary cutter (optional)
Utility blade
Cutting mat
Straight edge or ruler
Brush (for spreading glue)
Scissors
1/4” Hole punch and hammer
A drill with a 1/4” bit can work
Tape
Pencil
Materials:
Binder board (or chipboard)
Neutral pH adhesive (bookbinding glue)
Bookcloth
Paper for cover liner (thicker paper - like card stock- is best)
3x Screw posts
Clear sleeves to hold your work
Magnets 1cm or smaller (optional)

STEP 1: Design and Dimensions

Step 1A: Covers and Side Strips
First, determine how large the portfolio will be. This will depend on the size of the clear sleeves (or paper) that the binder will contain. The portfolio itself should overlap its contents by 1/4” on all sides. This means that the covers should be 1/2” larger in height and width than the clear slides. In this example, the sleeves that I used are 10” x 12 1/2”, so the covers were made to be 10 1/2” x 13”. Use a straight edge to trace two identical covers into the binder board.
Next, determine the size of the side strips which allow the cover to open and close. For this “hidden screw post” design, each cover will need two side strips. Side strips will have a width of 3/4” and the same height as the covers. Use a straight edge to trace four identical side strips into the binder board.
Step 1B: Spine and Top Flap
The magnetic closure flap is made of two pieces: A spine, and a top flap. The top flap, which will contain the magnets, is 4” wide. The width of the spine should be roughly the same height as the screw posts. For this project, the spine was cut to 1”. Use a straight edge to trace the spine and top flap pieces into the binder board, with the same height as the covers and side strips.
Step 1C: Spacers
Lastly, you will need to create spacers from the binder board. Spacers will allow you to uniformly and precisely lay-out the pieces during assembly.
Use a straight edge to trace each of these spacers into the binder board:
1x 3/8” spacer
2x 1/4” spacers
1x 5/8” spacer
Step 2: Cut Pieces out of the Binder Board
Align a straight edge along each line in the binder board, and cut out all of the pieces with a utility blade. Do not try and cut any pieces with a single pass. Take your time and make many passes with light pressure.
Step 3: Bookcloth and Staging

Step 3a: Bookcloth
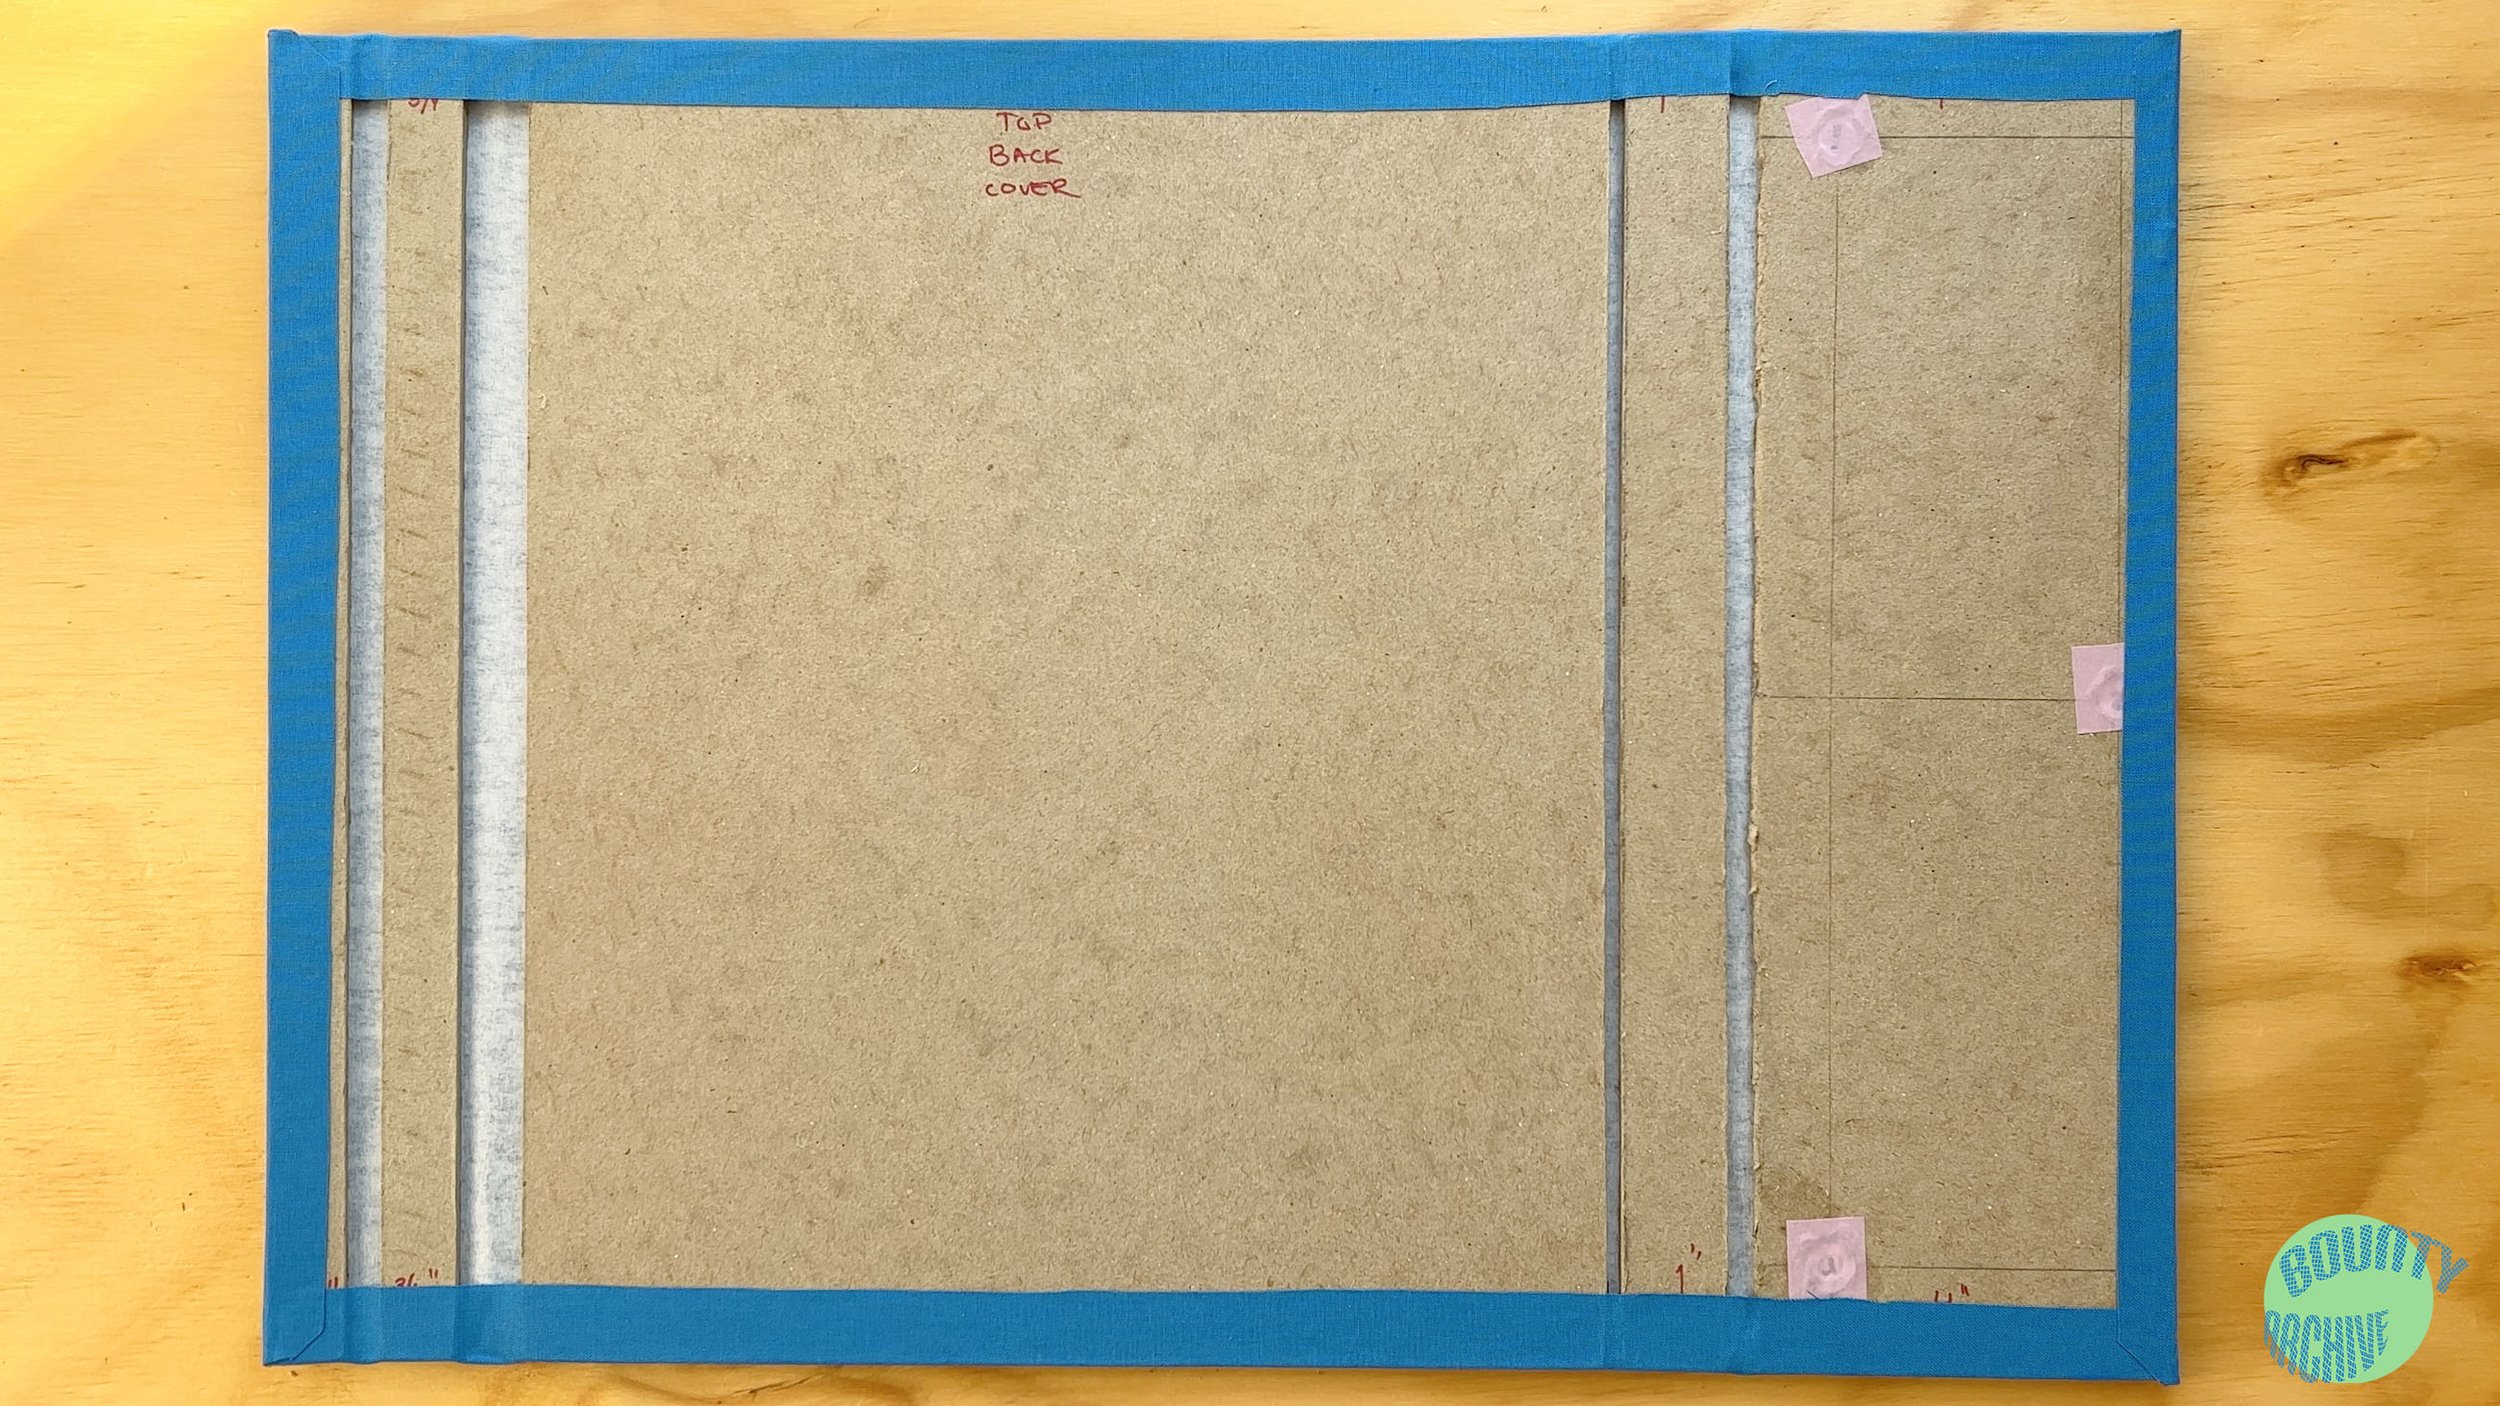
The bookcloth should be at least 3/4” larger than the assembled cover on all sides, so add 1 1/2” to the height and width of your cover, for the size of the bookcloth. When making this calculation, lay-out all of the pieces and spacers to get an accurate measurement. Like this:
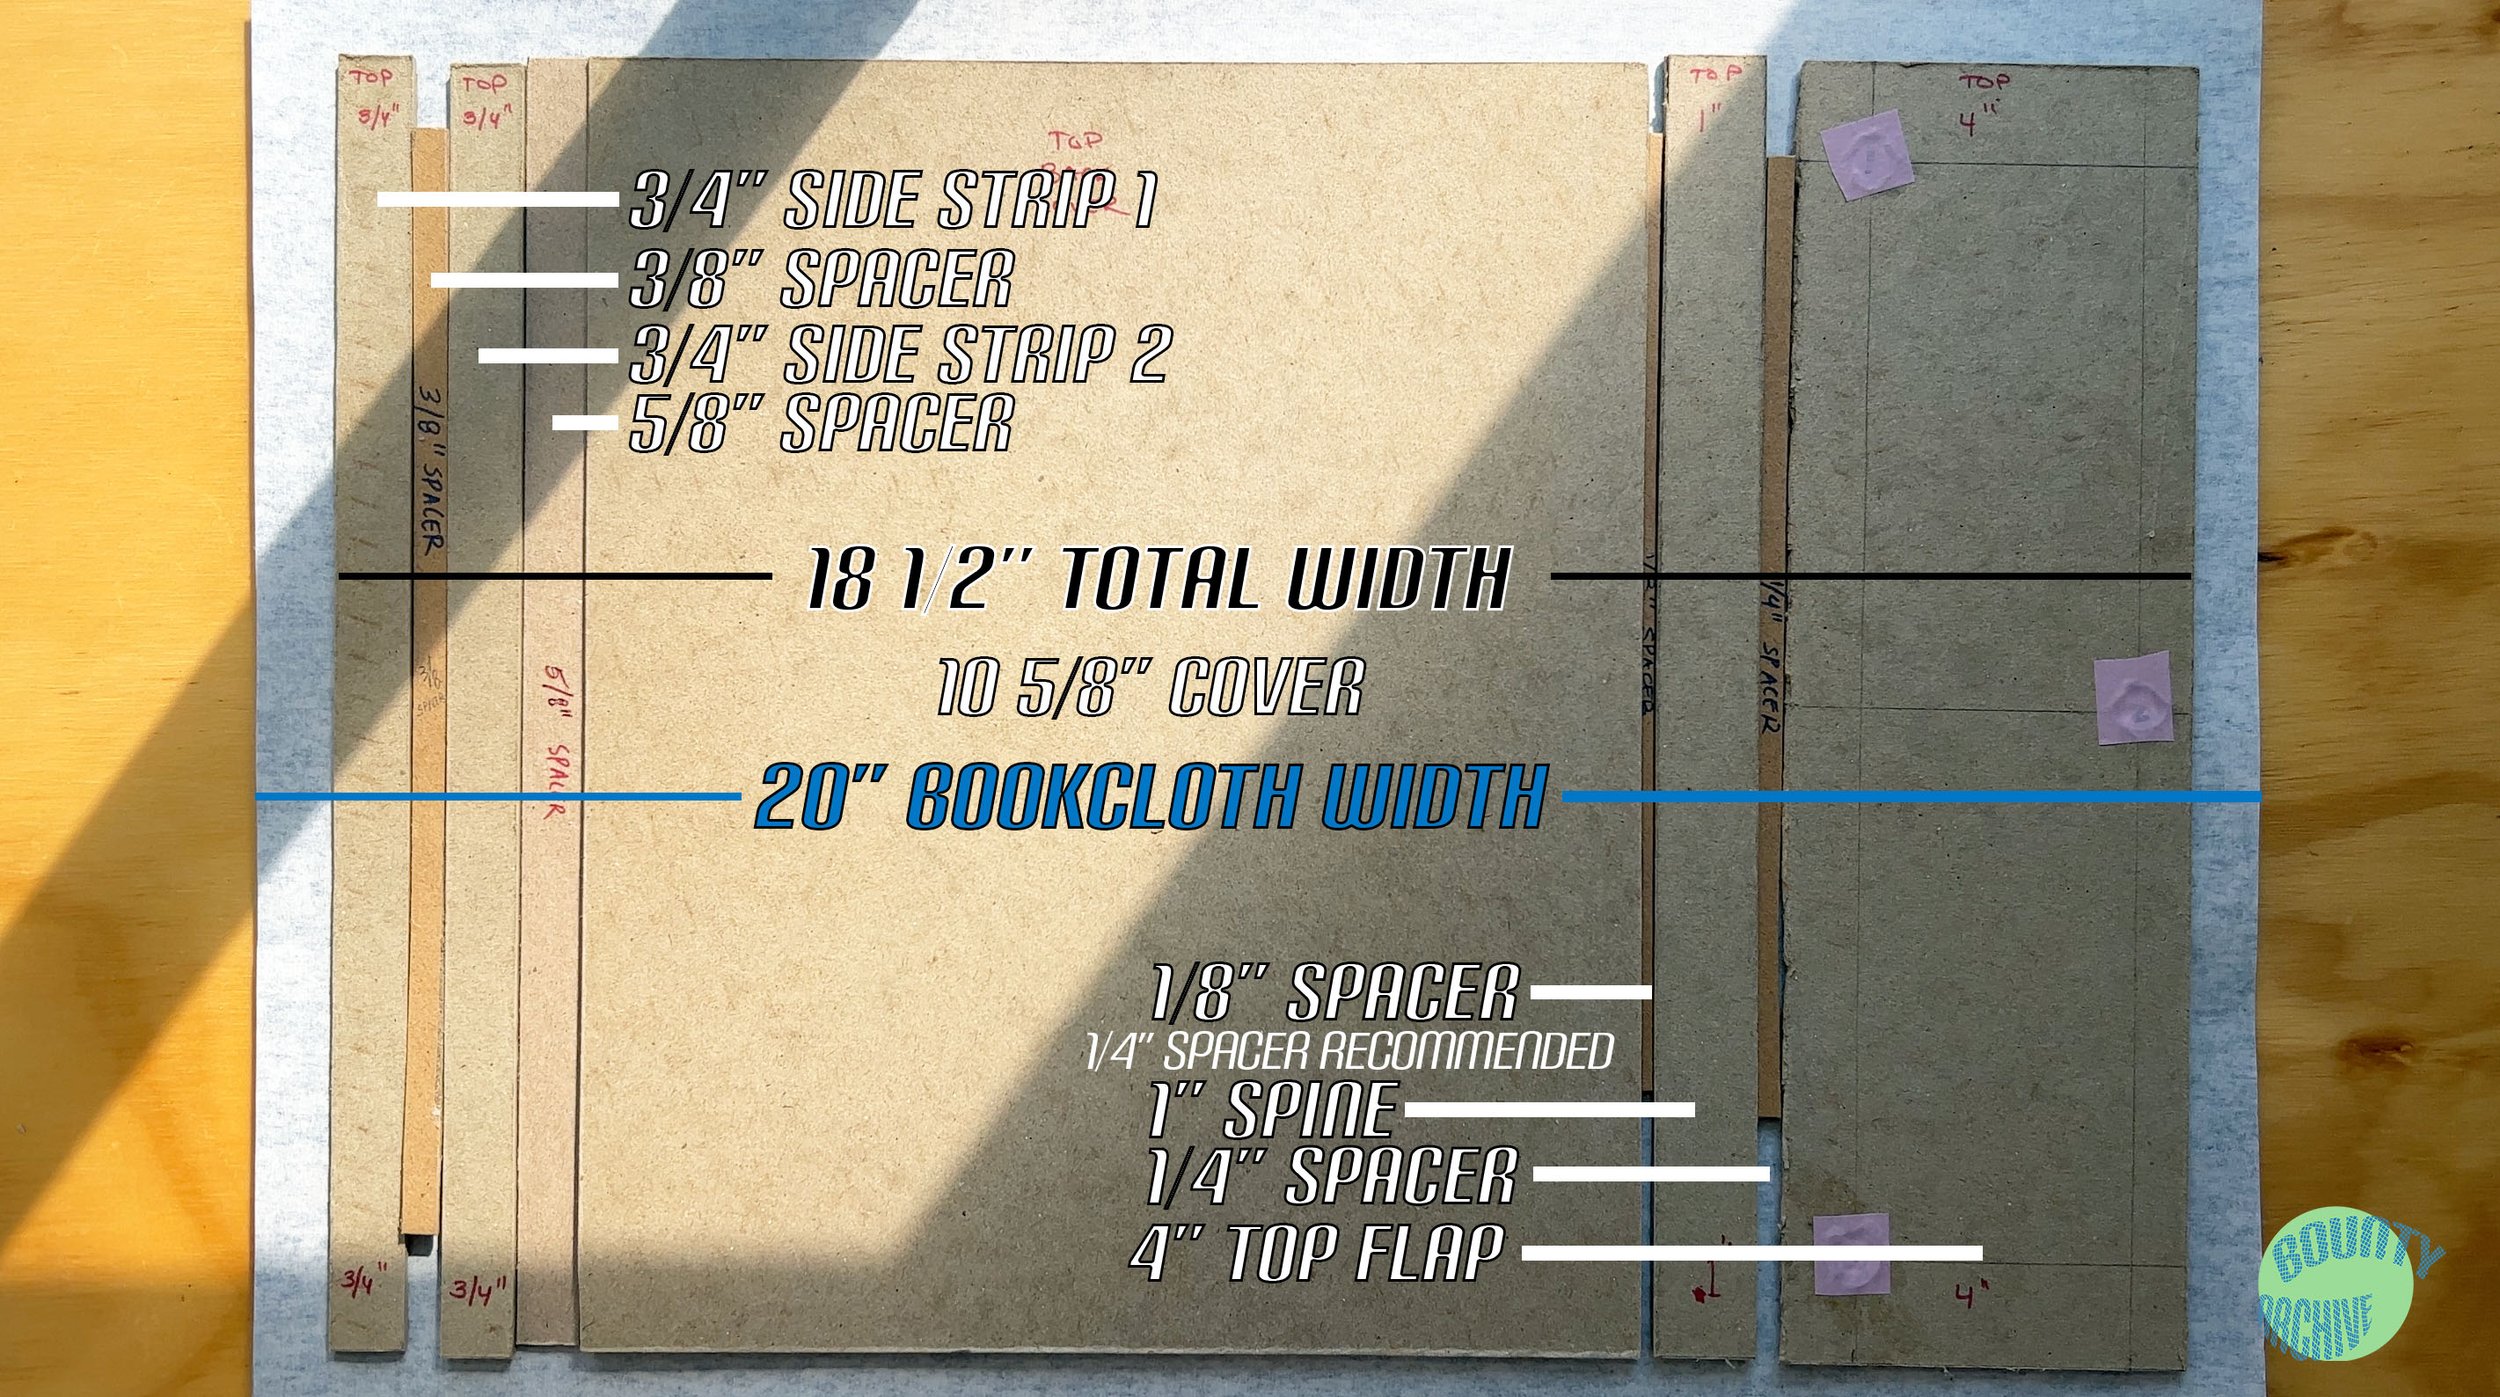
In this example, the back cover is comprised of: (3/4” side strip) + (3/8” spacer) + (3/4” side strip) + (5/8” spacer) + (10 5/8” cover) + (1/8” spacer) + (1” spine) + (1/4” spacer) + (4” top flap) for a total width of 18 1/2”. The height of the cover is 13”, so the final assembled size of the back cover is 18 1/2” x 13”. After adding 1 1/2” to each dimension to allow the book cloth to be wrapped-around the cover, the cloth for the back cover will be 20” x 14 1/2”.
Repeat the same process for the front cover. If you do not plan to add the optional magnetic closure, then both the front and back covers will be identical.
Use a straight edge to mark the dimensions onto the backside of the bookcloth, and cut both pieces out with scissors or a rotary cutter.
Step 3B: Liner Paper
A liner paper will cover the inside face of both covers, giving the portfolio a finished touch. When selecting a liner paper, make sure it’s stronger than regular printer paper. It will be creased into the folds of the covers, and you do not want it to tear. For this project, I went with a matte grey card stock.
Note: Alternatively, bookcloth can be used for a liner.
The liner should be 1/2” shorter than each dimension of the covers, such that the liner sits exactly 1/4” inside each edge of the cover.
Step 3C: Staging
Now that all of the materials are prepared, The last step before assembly is staging. For each cover, place the bookcloth facedown and lay-out all of the pieces. With the components all in place, trace the outline of just the cover into the two pieces of bookcloth.
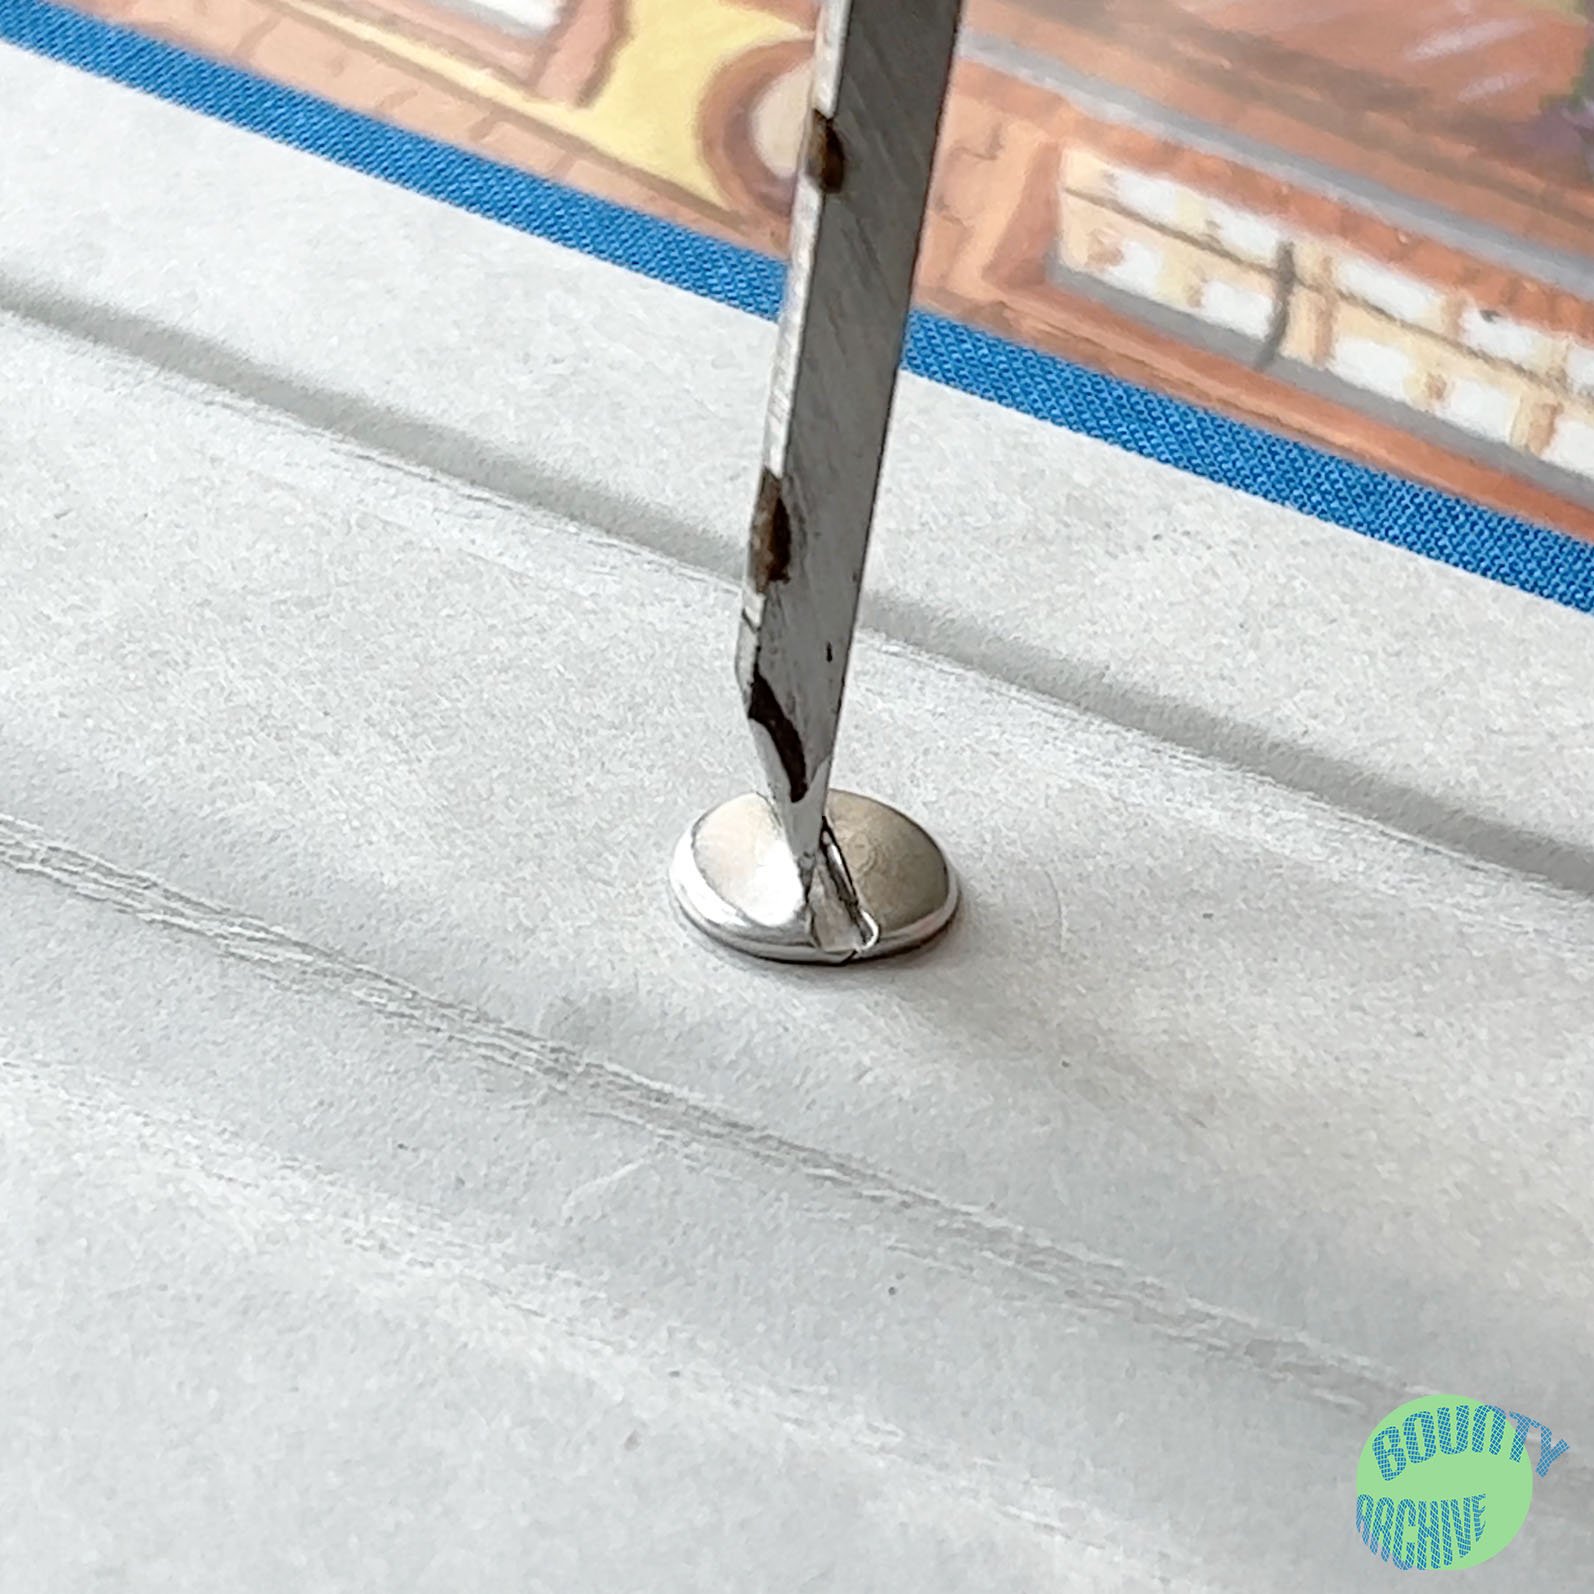
If you plan to add magnets to your cover and top flap, then do so now before you glue these pieces to the bookcloth. Refer to the video guide for tips on integrating magnets.
Step 4: Assemble Covers
Step 4A: Gluing the Pieces Down

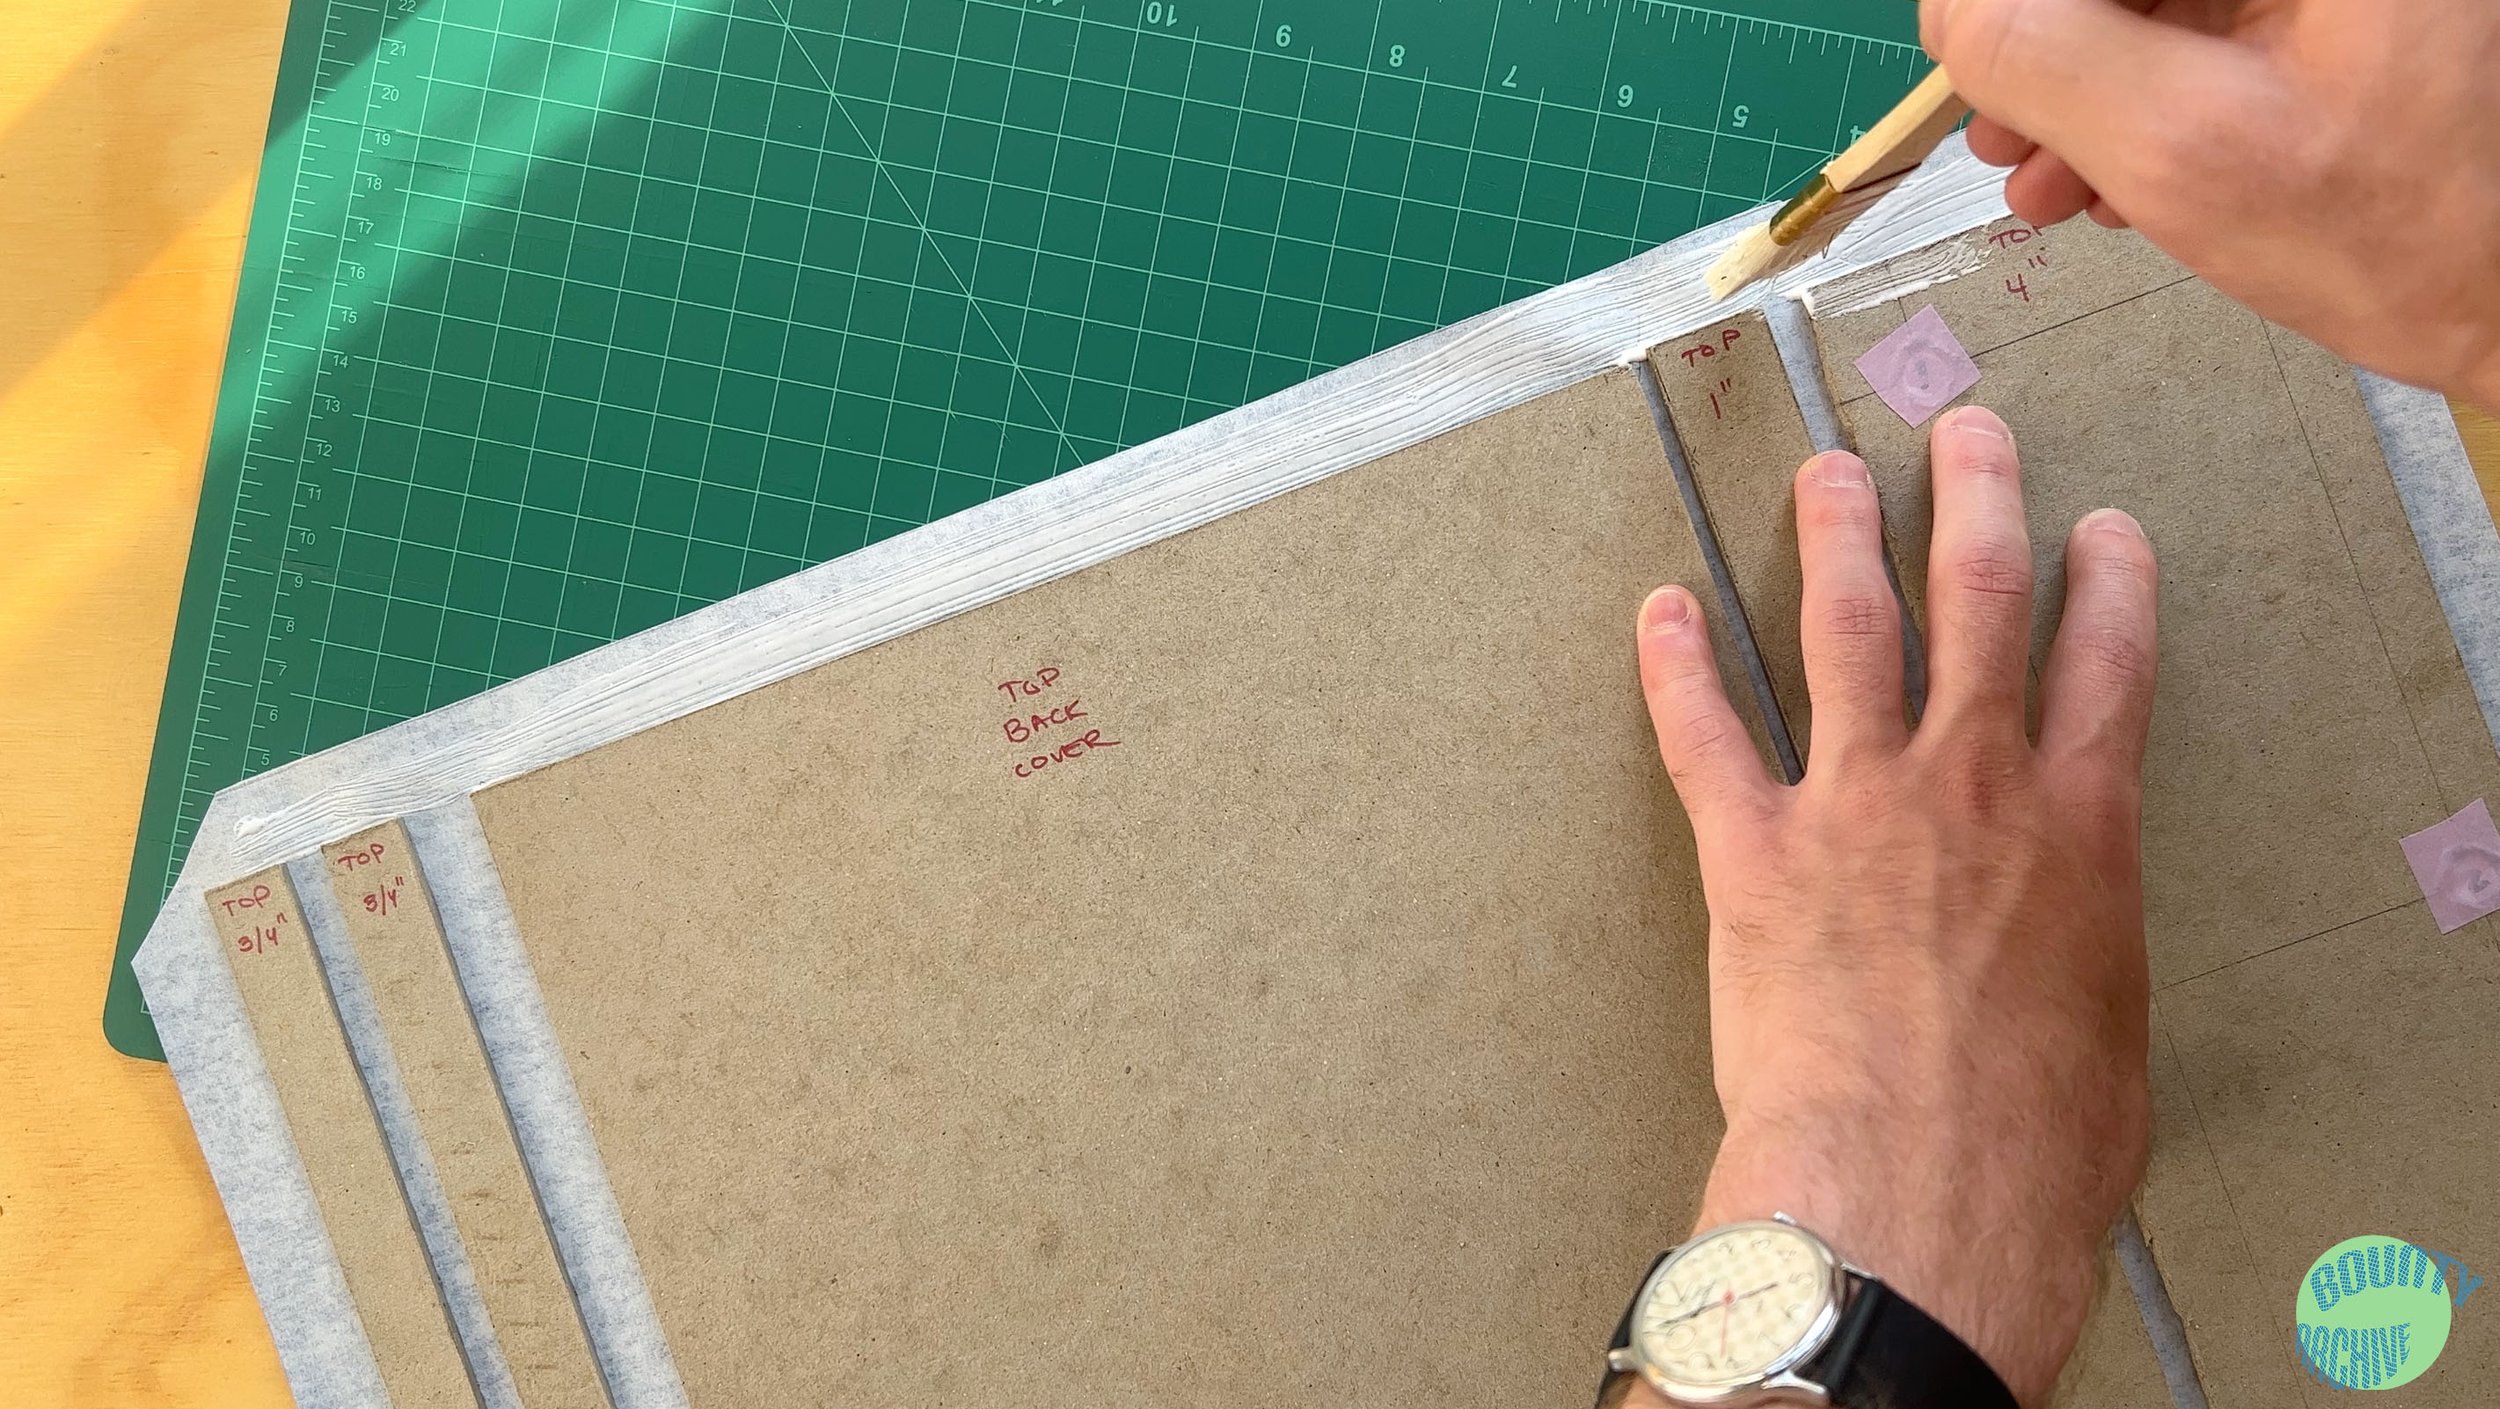
Beginning with either cover, apply glue liberally to the backside of the cover piece, and spread it around with the brush. Take care to extend the glue to all edges and corners. Place the cover piece into the area that you traced on the bookcloth, and press gently. Use your bone folder first against the binder board, pushing down and towards the edges. Flip the cover over, and use the bone folder to smooth any air bubbles you see in the cloth.
Flip the cover back over and add a spacer alongside the cover. Glue a side strip beside it, using a straight edge to align the bottom of the side strip with the bottom of the cover piece. Once you’ve secured the side strip, remove the spacer before any excess glue dries and locks it in place. Repeat this process with the other side strip to complete the cover, remembering to flip the cover over and smooth any air bubbles each time a new piece is added.
Step 4B: Folding the edges
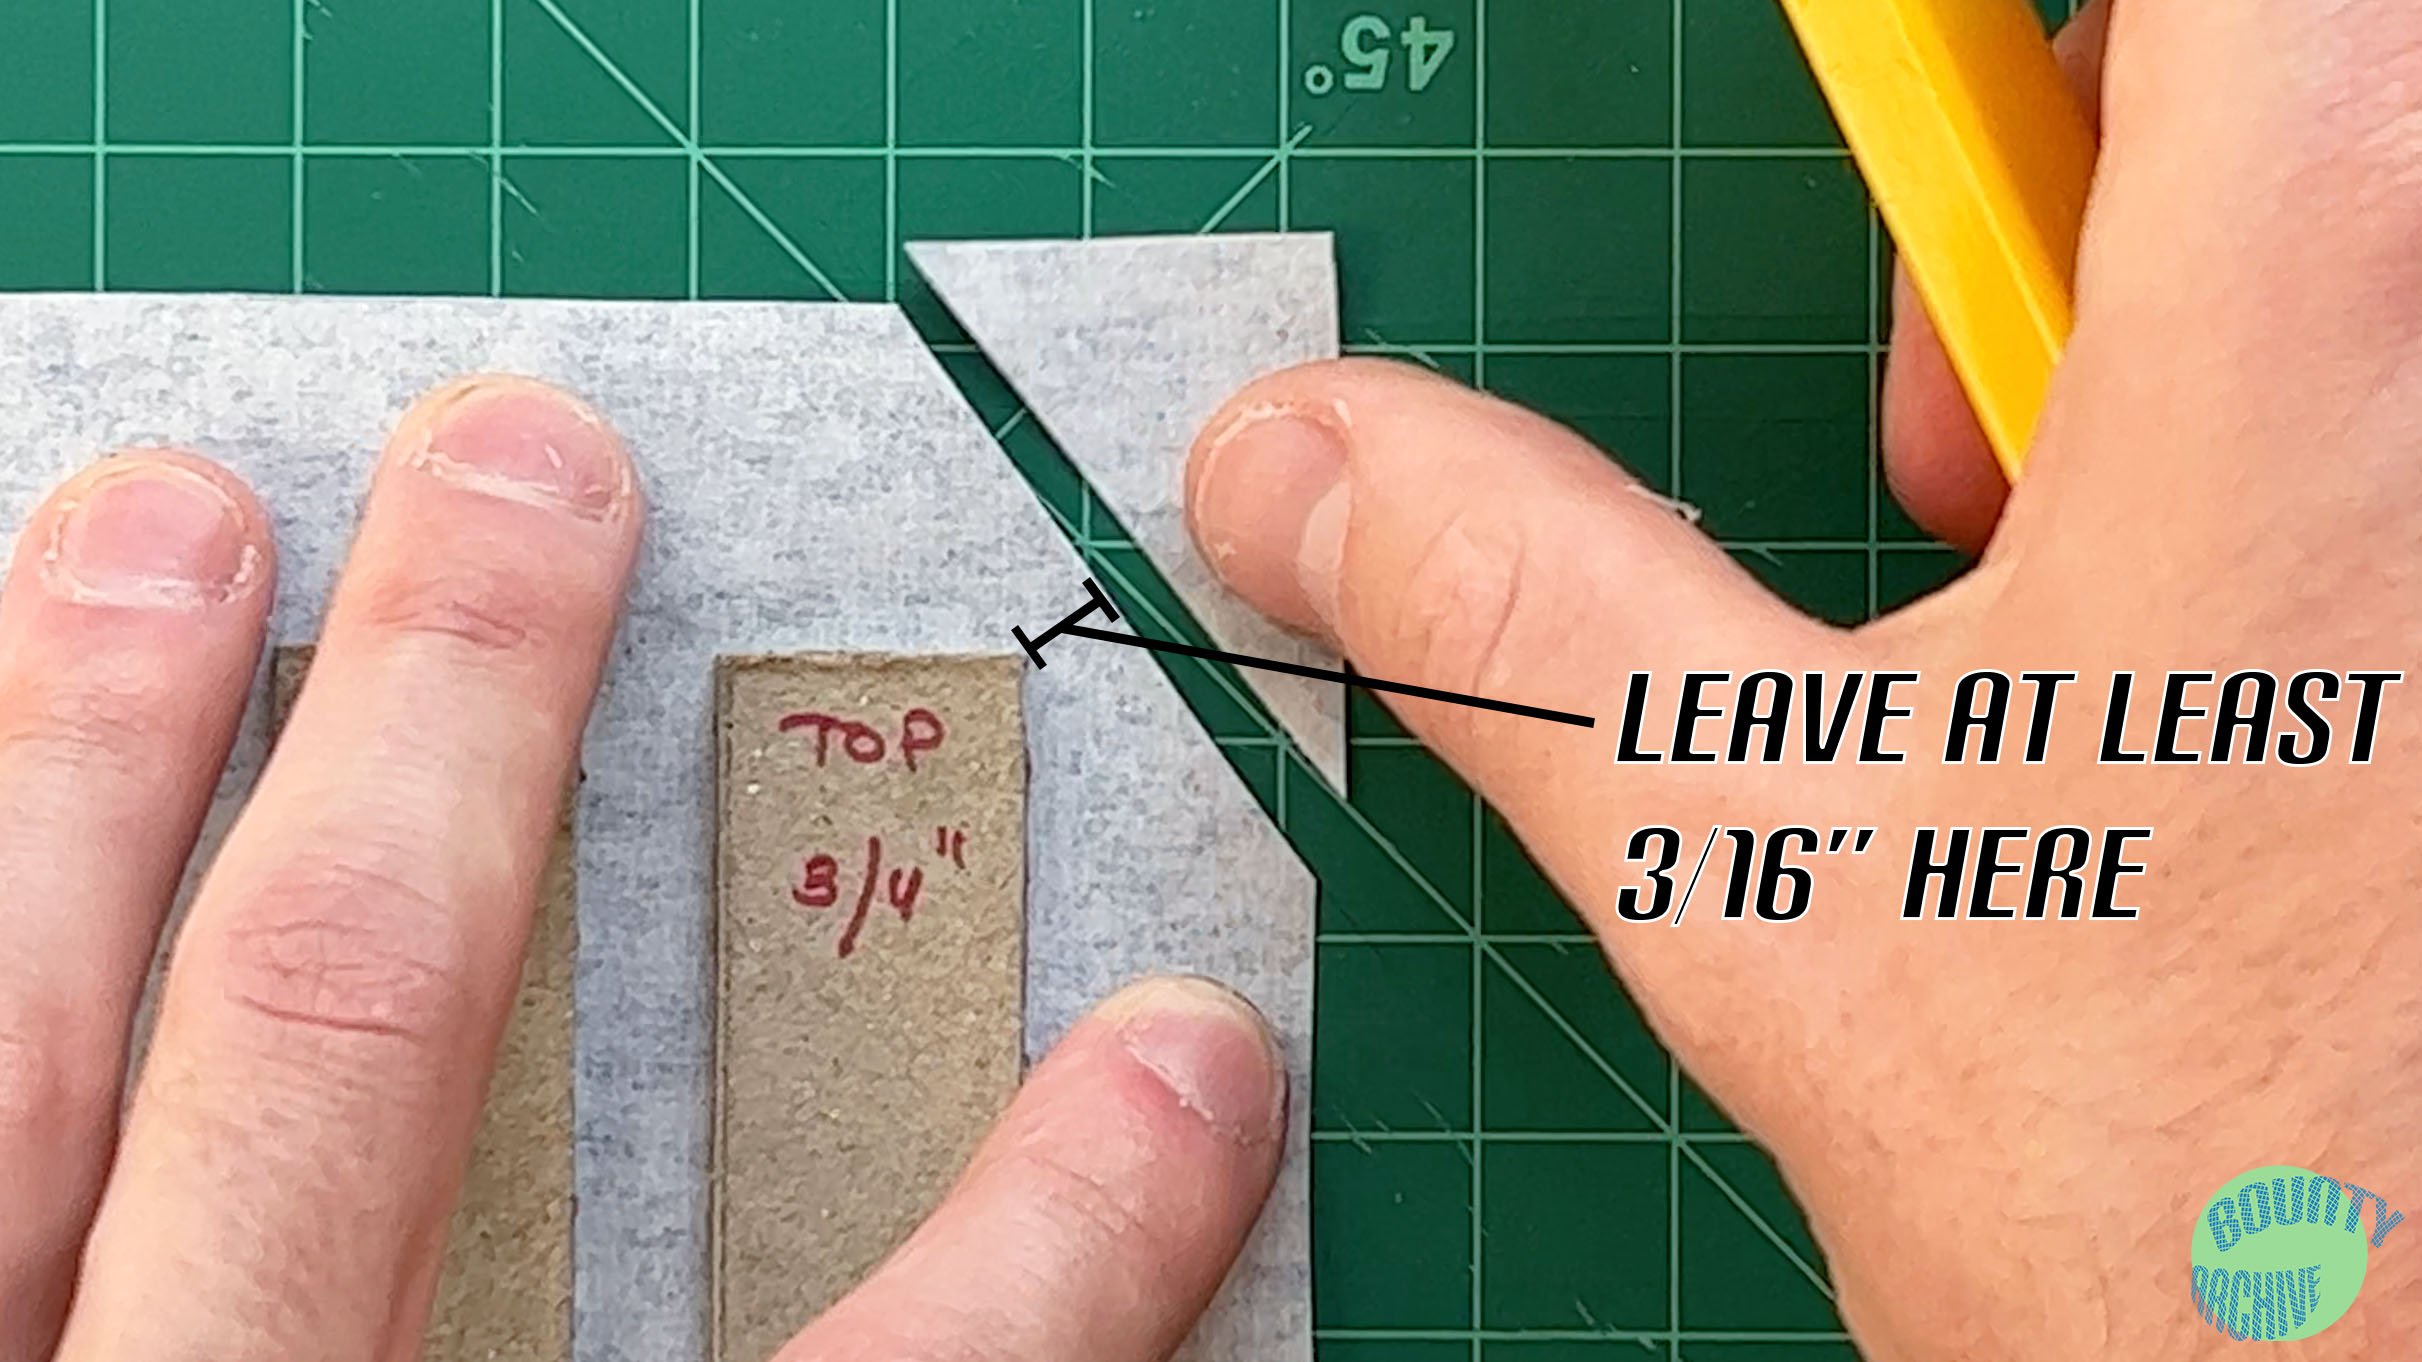
Once all of the pieces are glued into place, there should be about 3/4” of excess bookcloth on all sides, which will be folded over the binder board. Begin by cutting all four corners of the cloth at a 45 degree angle. Be sure not to cut the corners right at the edge of the binder board. Leave at least 3/16” or so. If you have a rotary cutter, this part is very satisfying.
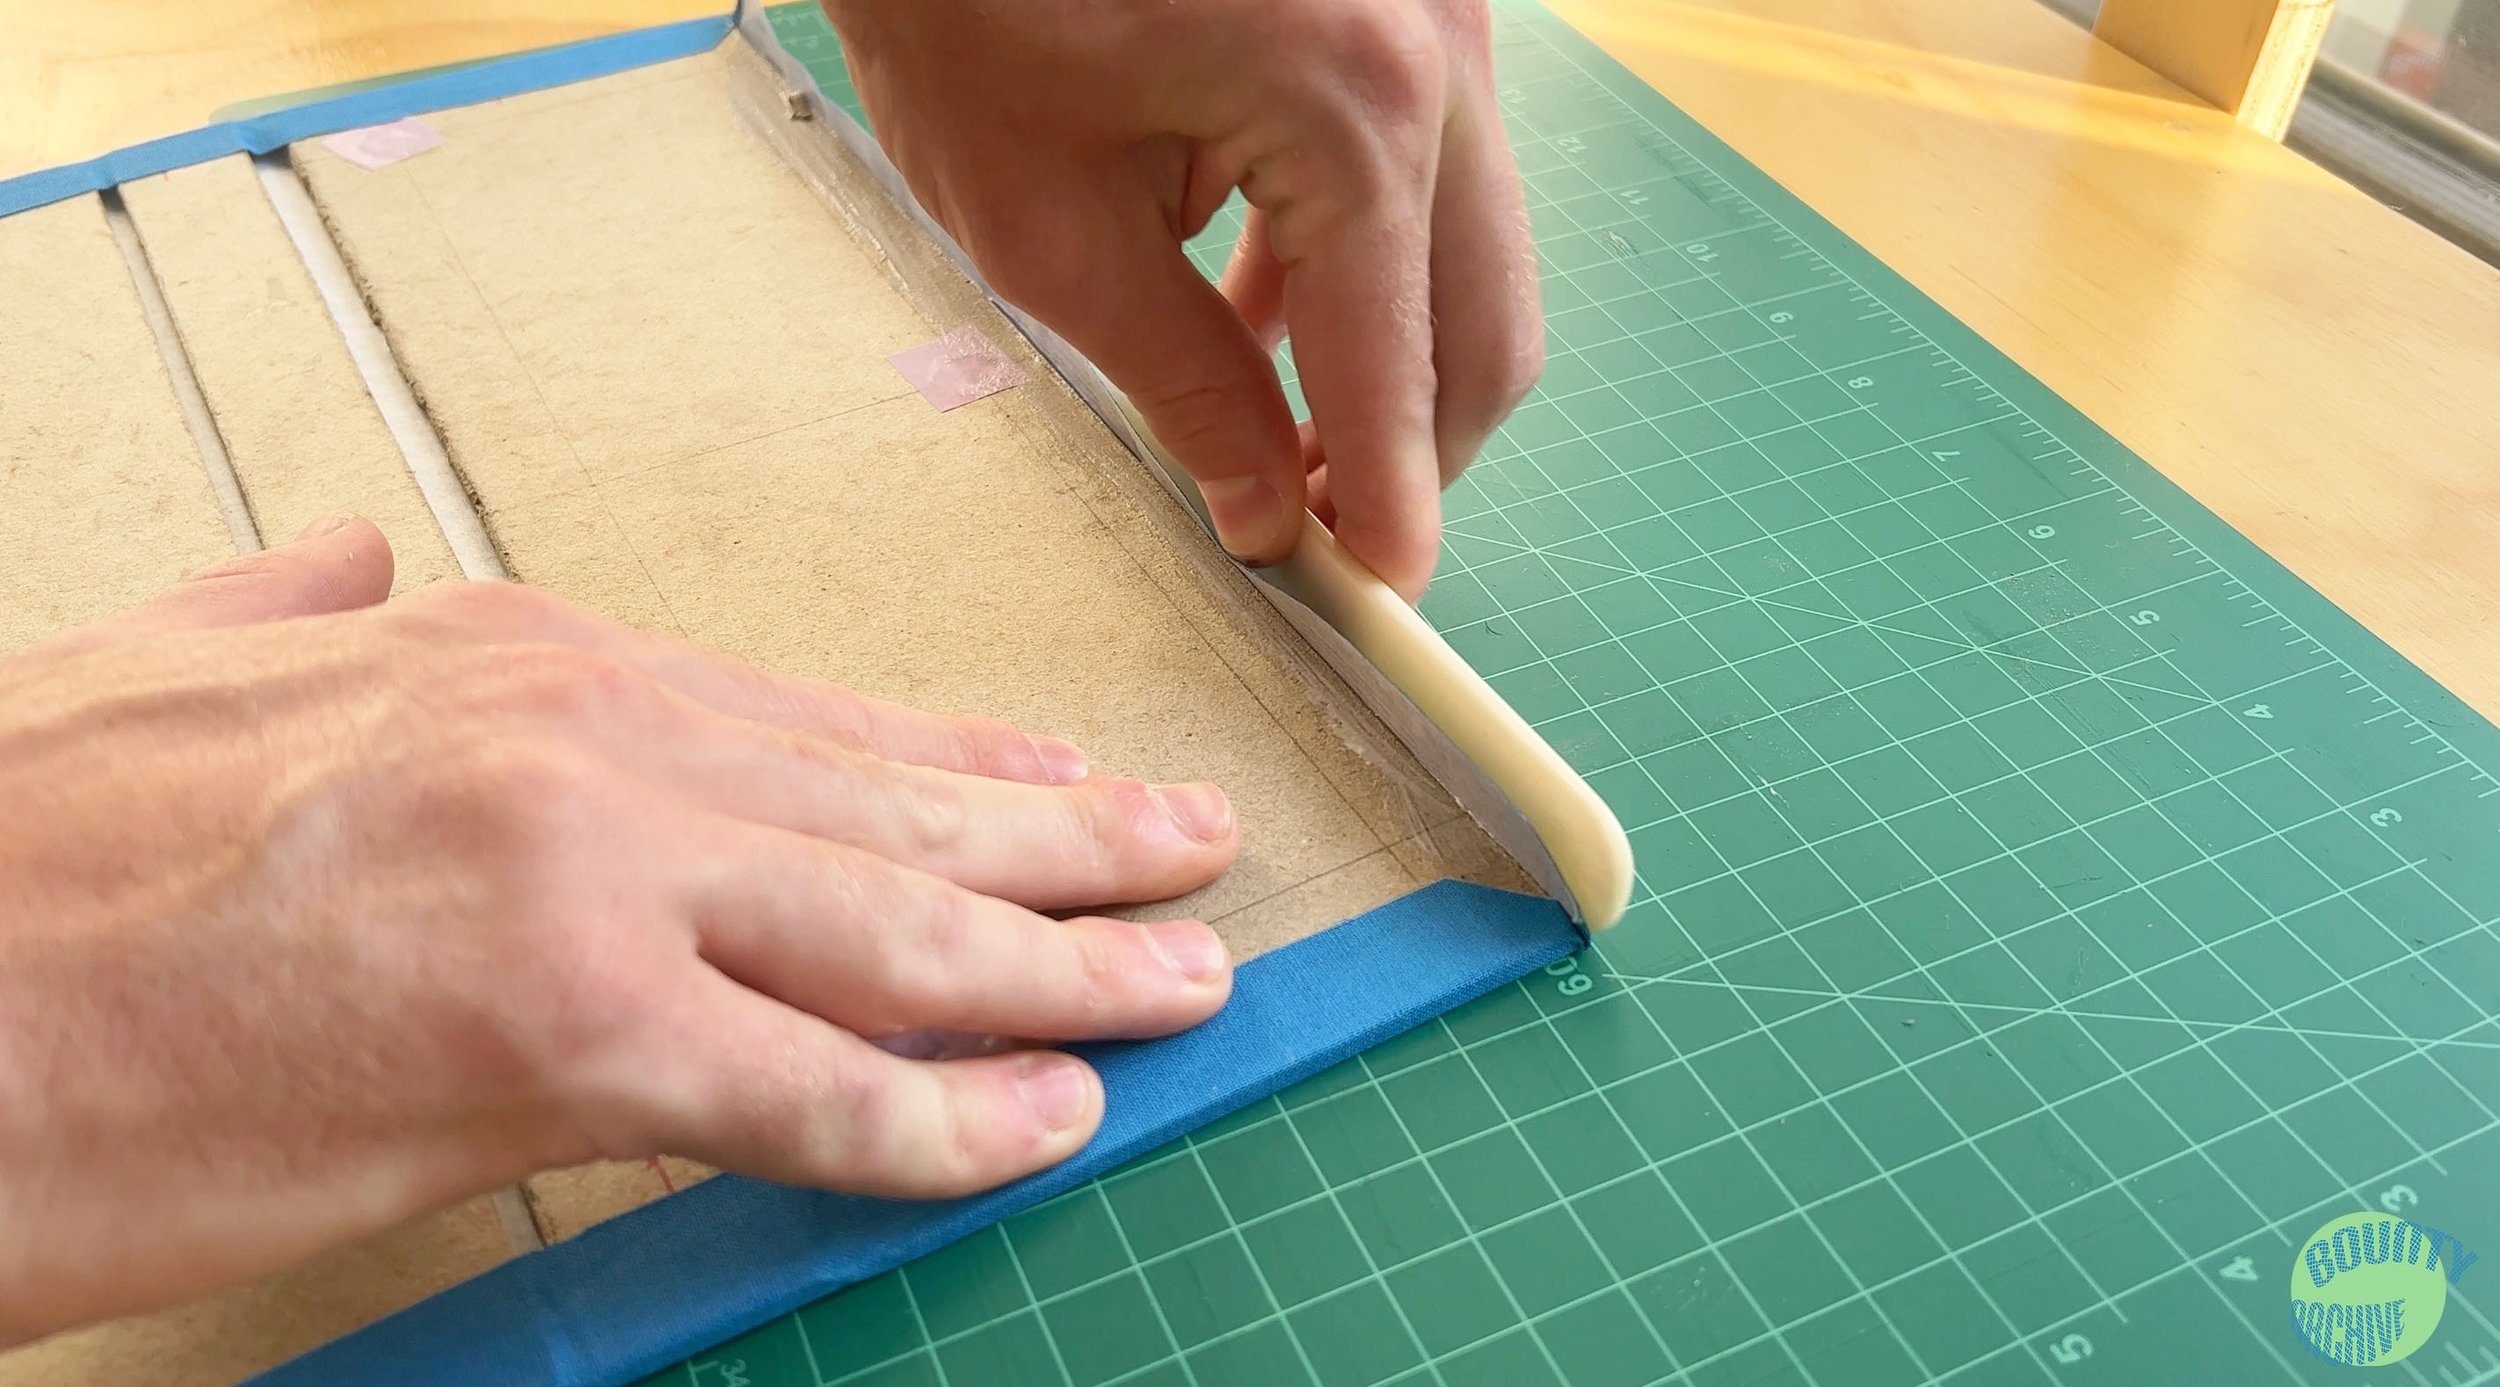
Use a brush to apply glue to the edges, and put the bone folder to work bending up the excess cloth, and then folding it down. Use the pointy tip of the bone folder to crease the corner before folding it over (like wrapping a present).

Repeat the process above with with other cover.
Step 4C: Apply the Liner Paper

Apply glue to the underside of the liner paper (or bookcloth), spreading it to all edges. Carefully place one corner of the paper down onto the inside of the cover exactly 1/4” from the bottom and side. If you line this up correctly, you should be able to lay the rest of the paper down and have it fall right in place. Use the bone folder to push the paper into the gaps between the pieces, working from left to right.
Repeat for the other cover.
Step 5: Binding
Step 5A: Punching Holes
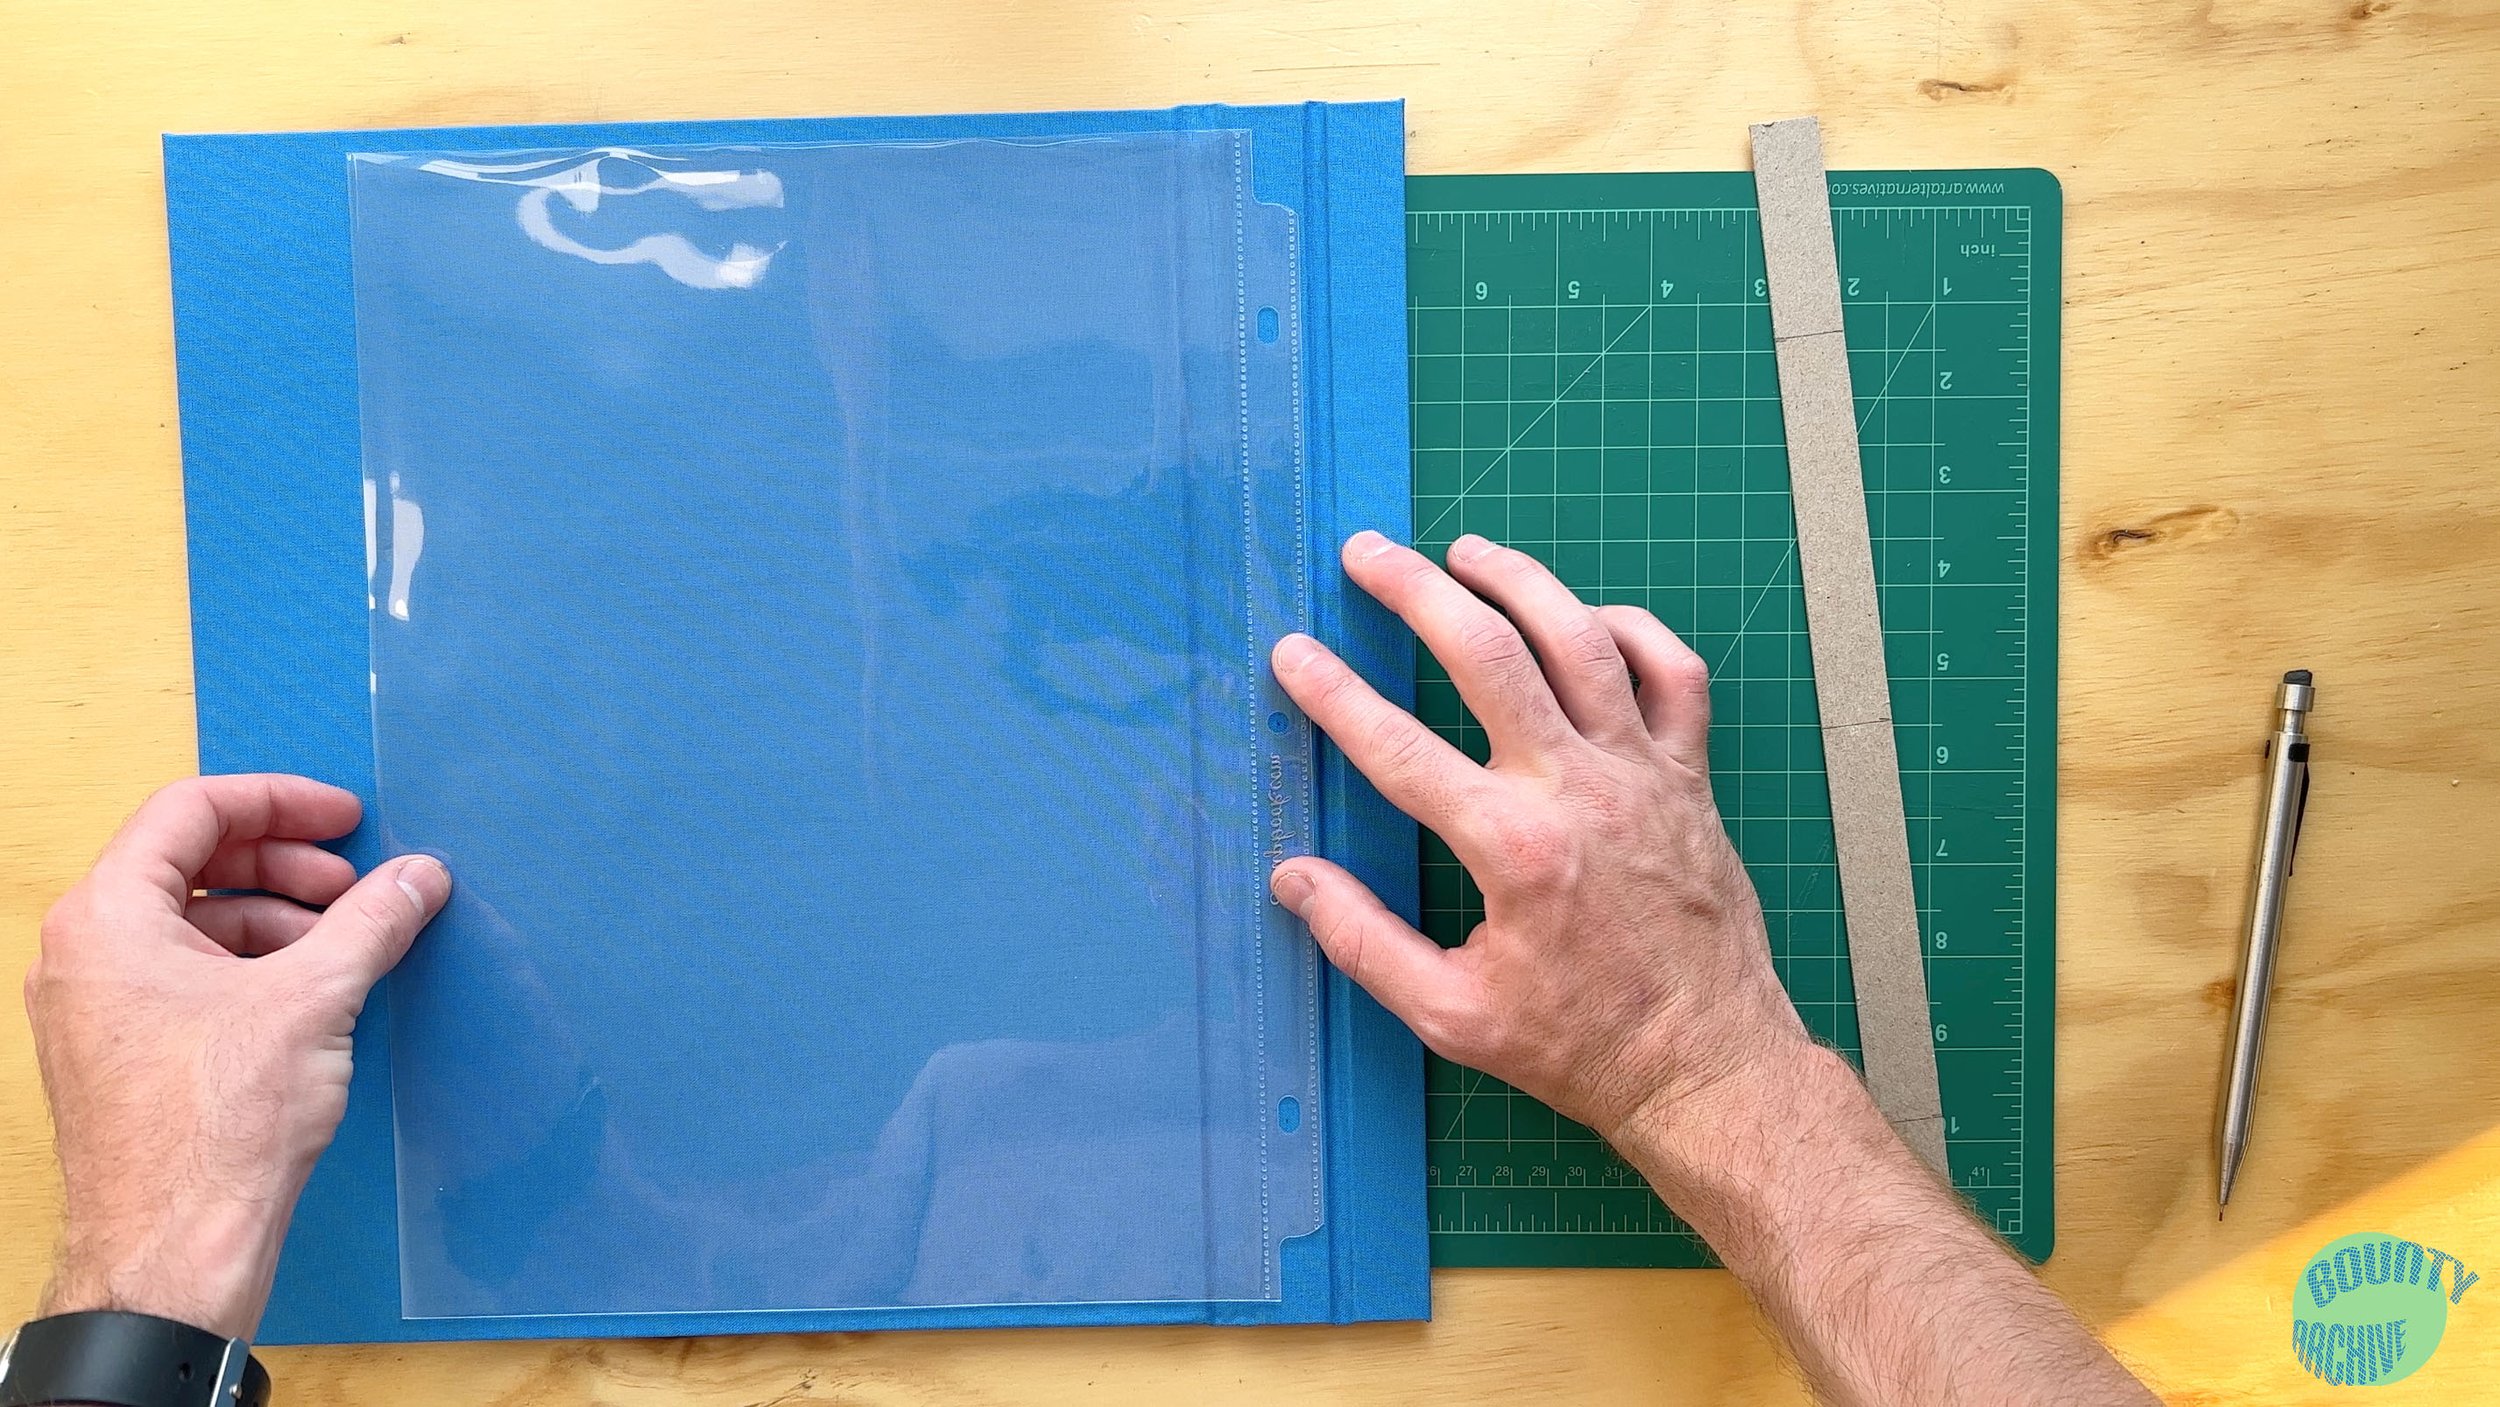

The portfolio will need three holes for the screw post bindings. The location of these holes will correspond with the spacing of the holes in the clear slides (or paper) that the book will hold.
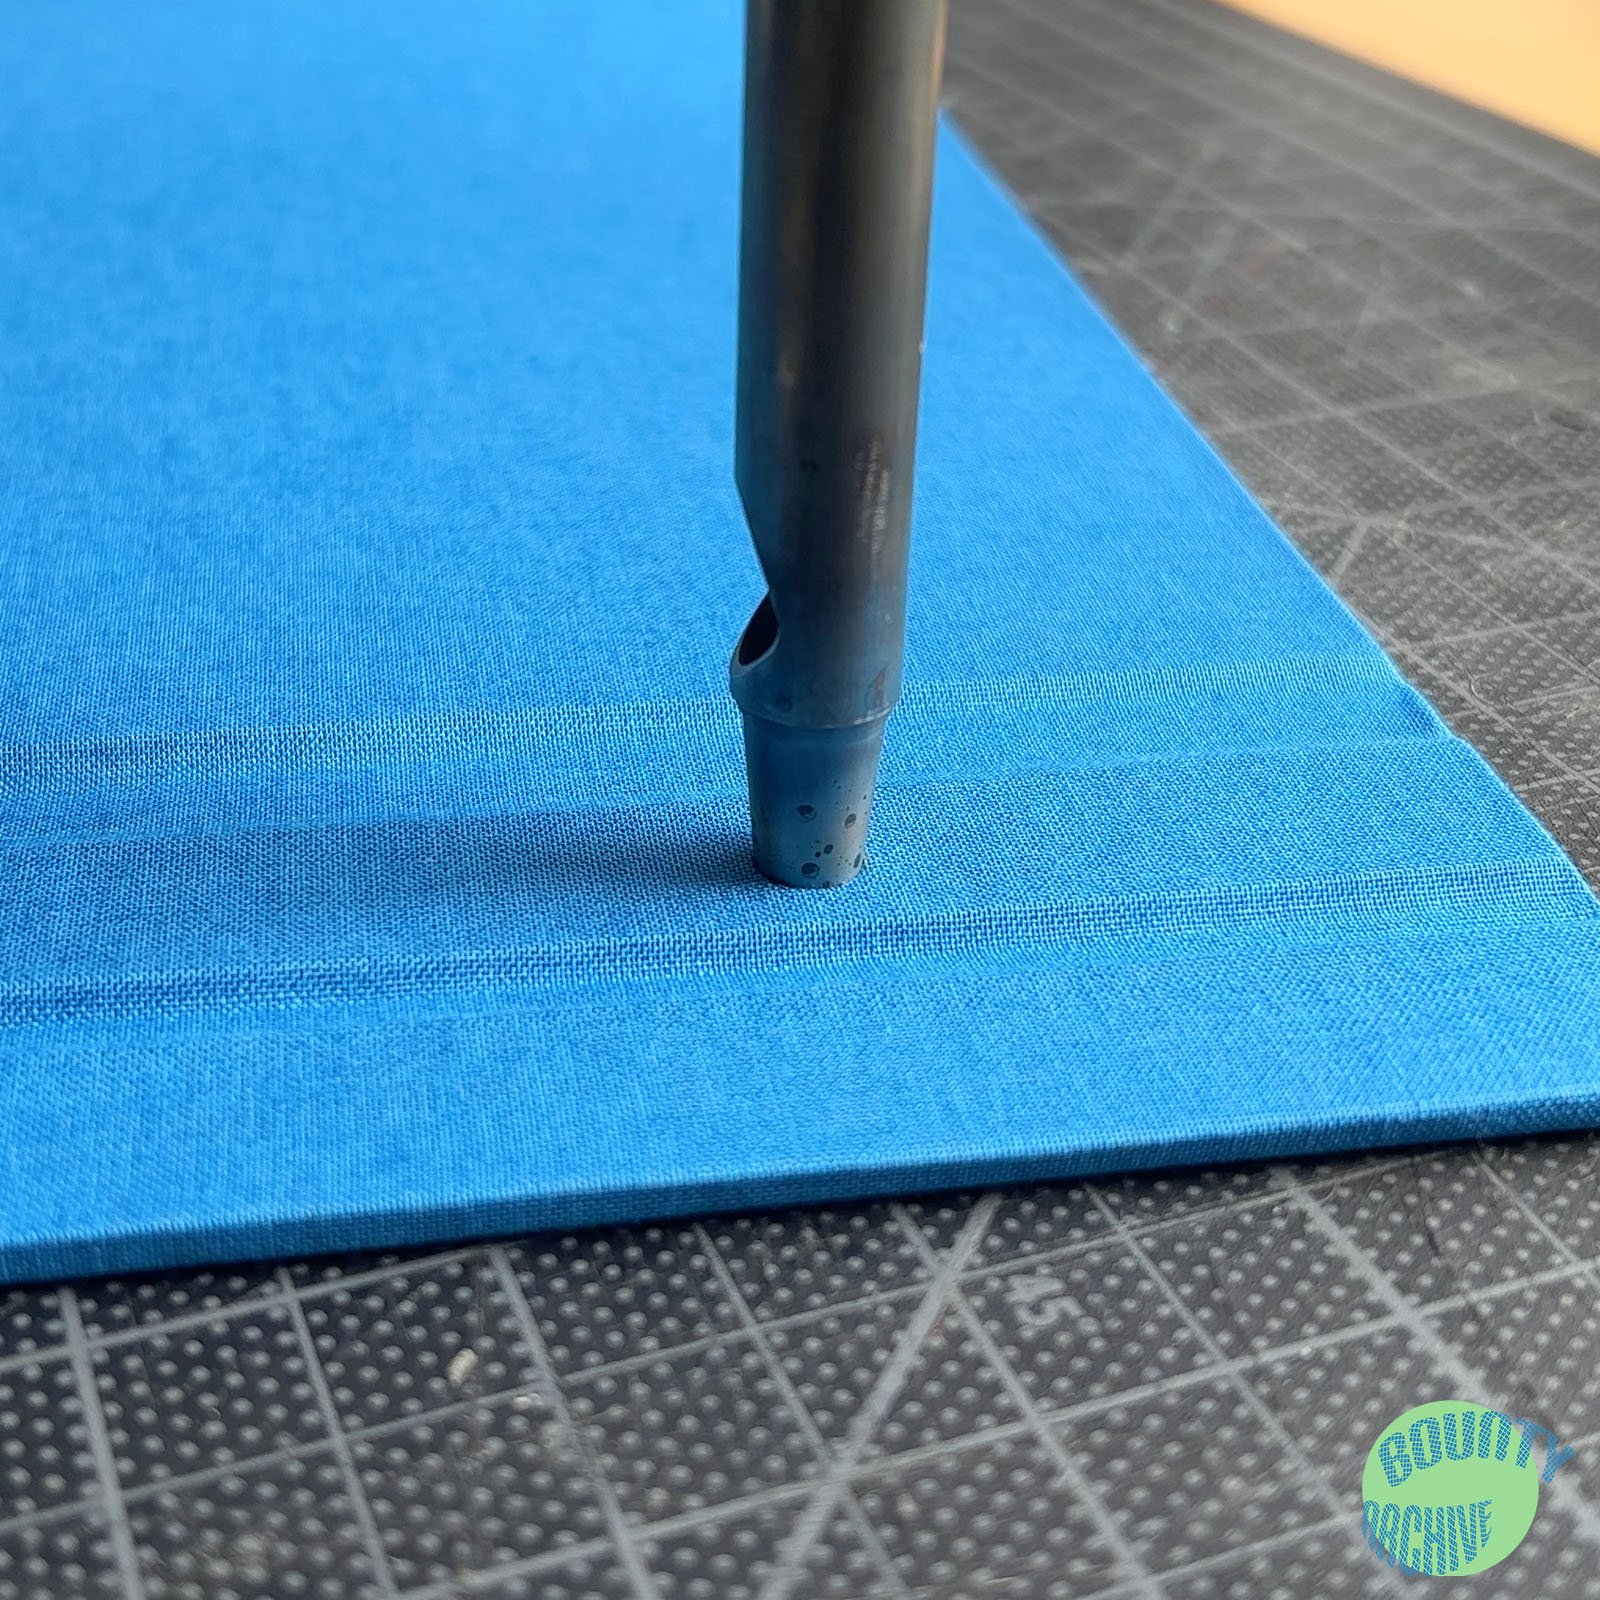
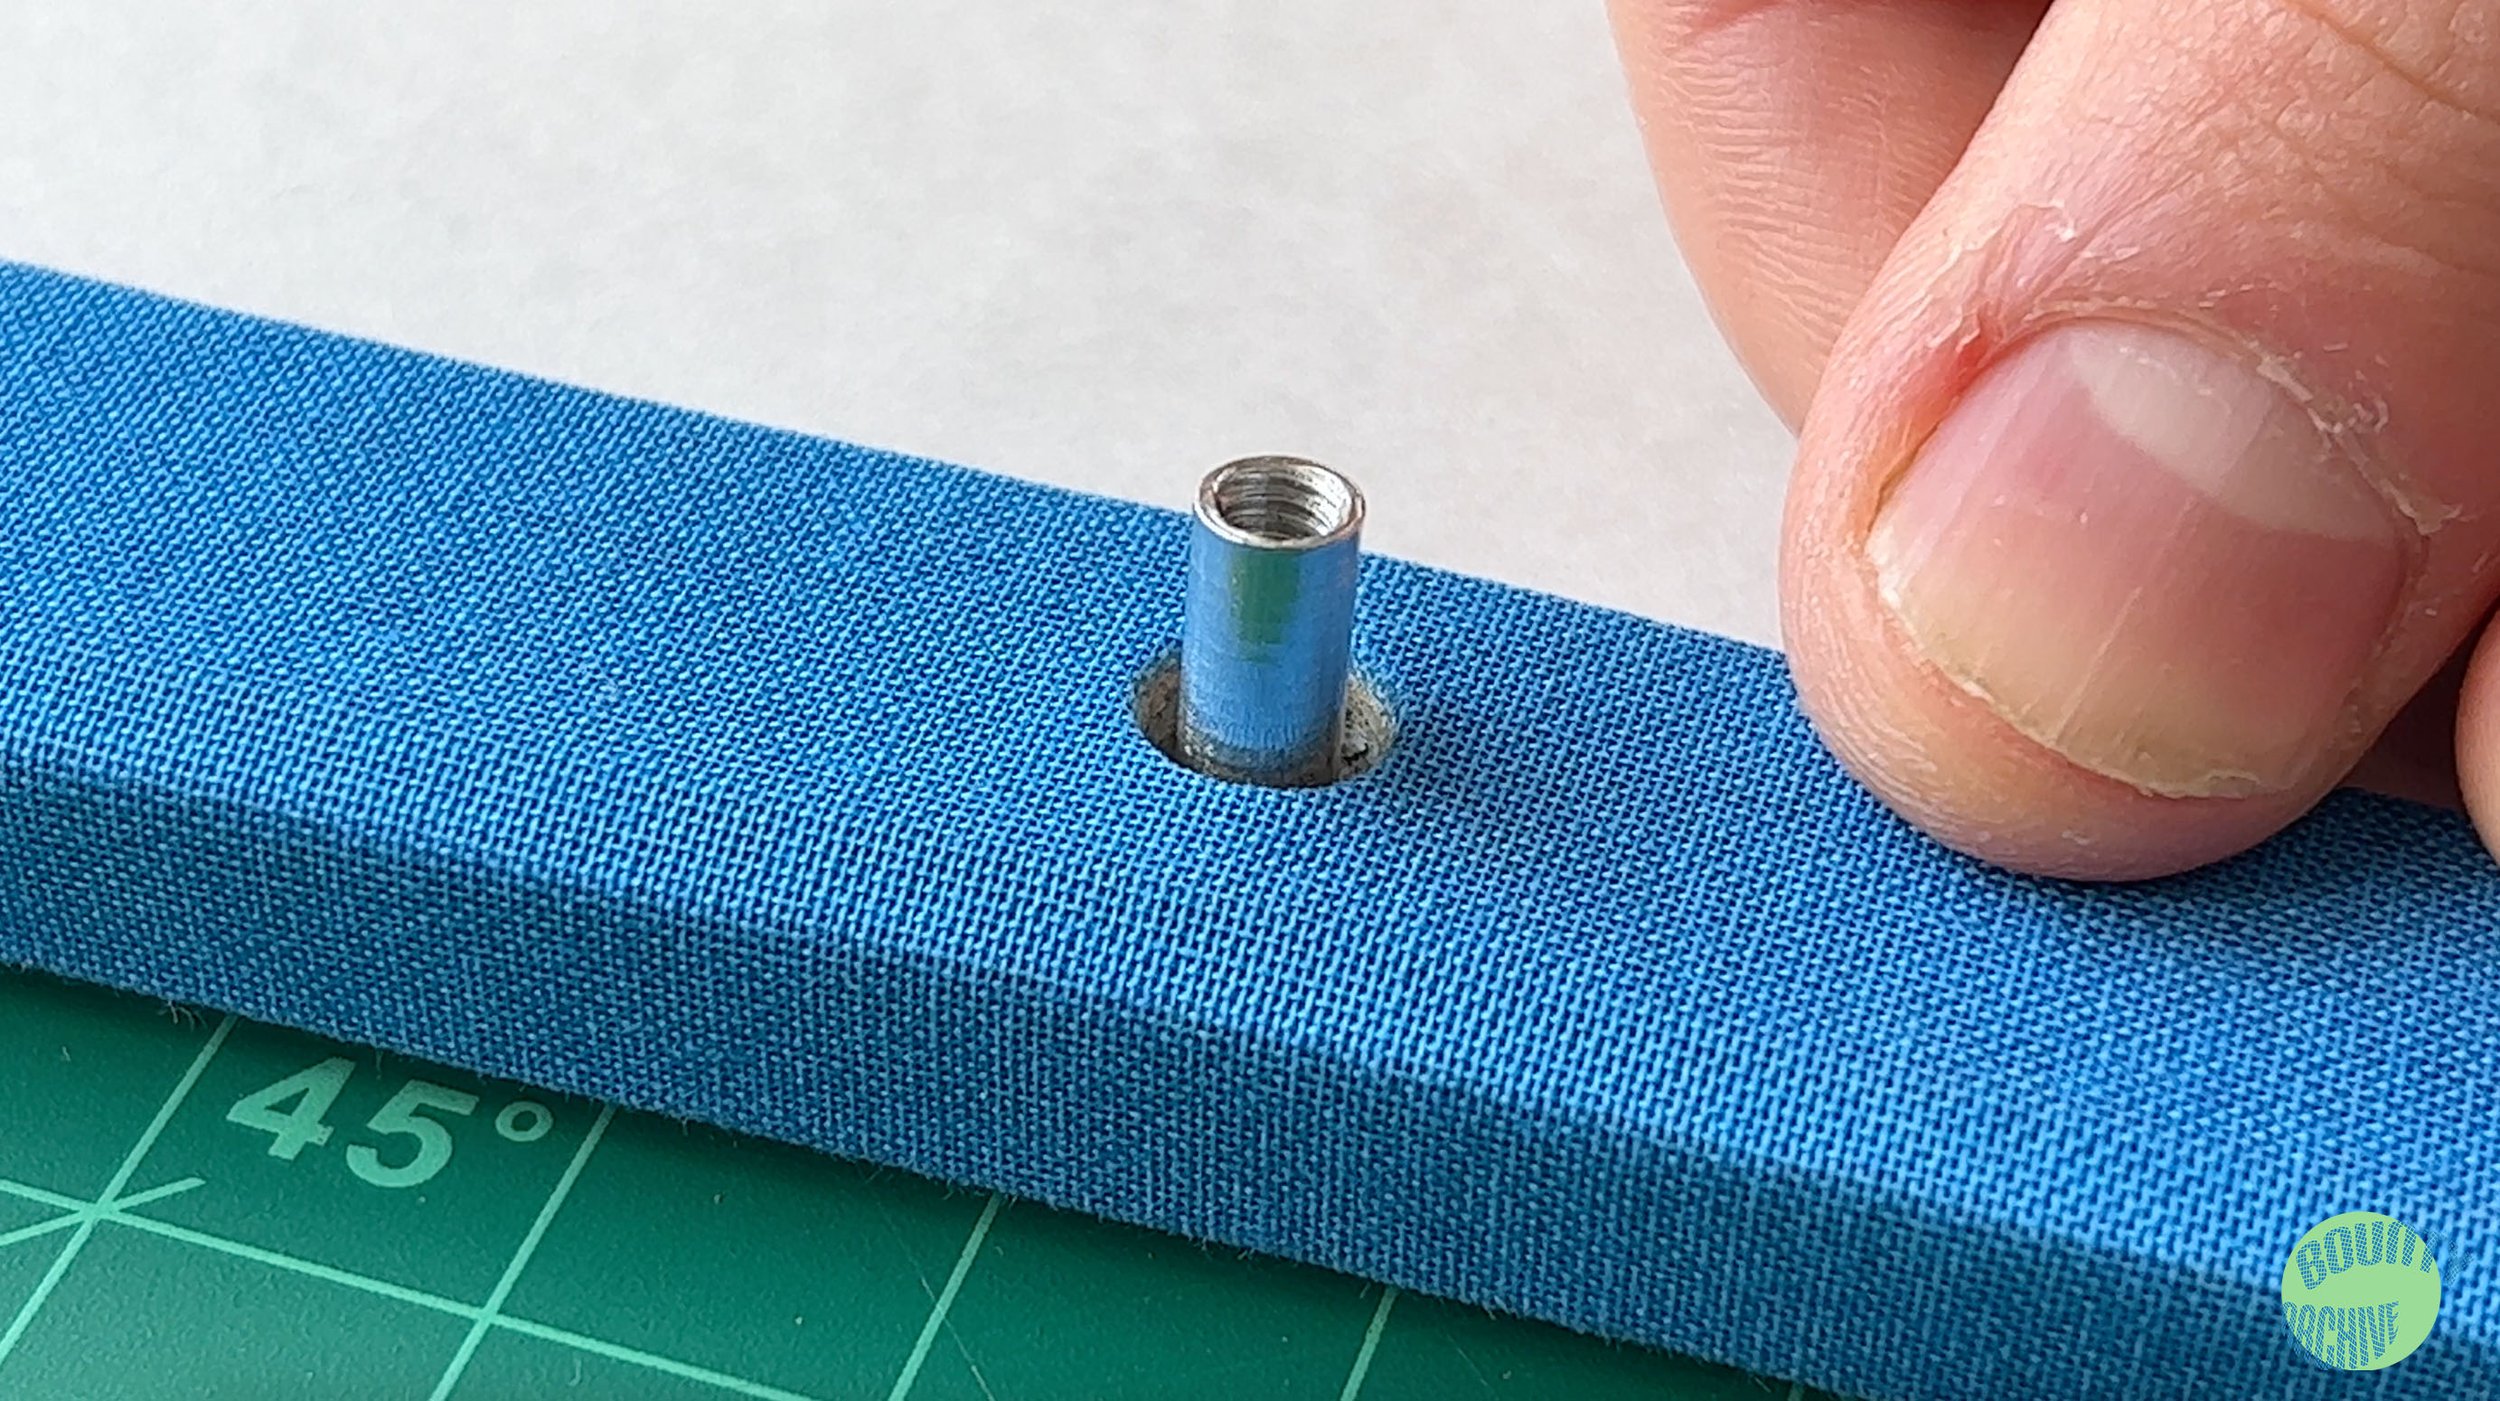
The holes will either be hammered using a 1/4” hole punch, or drilled using a 1/4” drill bit. In either case, the hole will be punched from the side with the book cloth.
Take one of the clear slides (or pieces of paper), and align it over the inner side strip of one of the covers. Position the center hole as close to the center of the cover as possible, and make a mark on the bookcloth in the center of the hole. Make two more marks for each of the other holes, and repeat this process for the other cover. Make sure your measurement is precise, otherwise the pages may not fit the bindings perfectly.
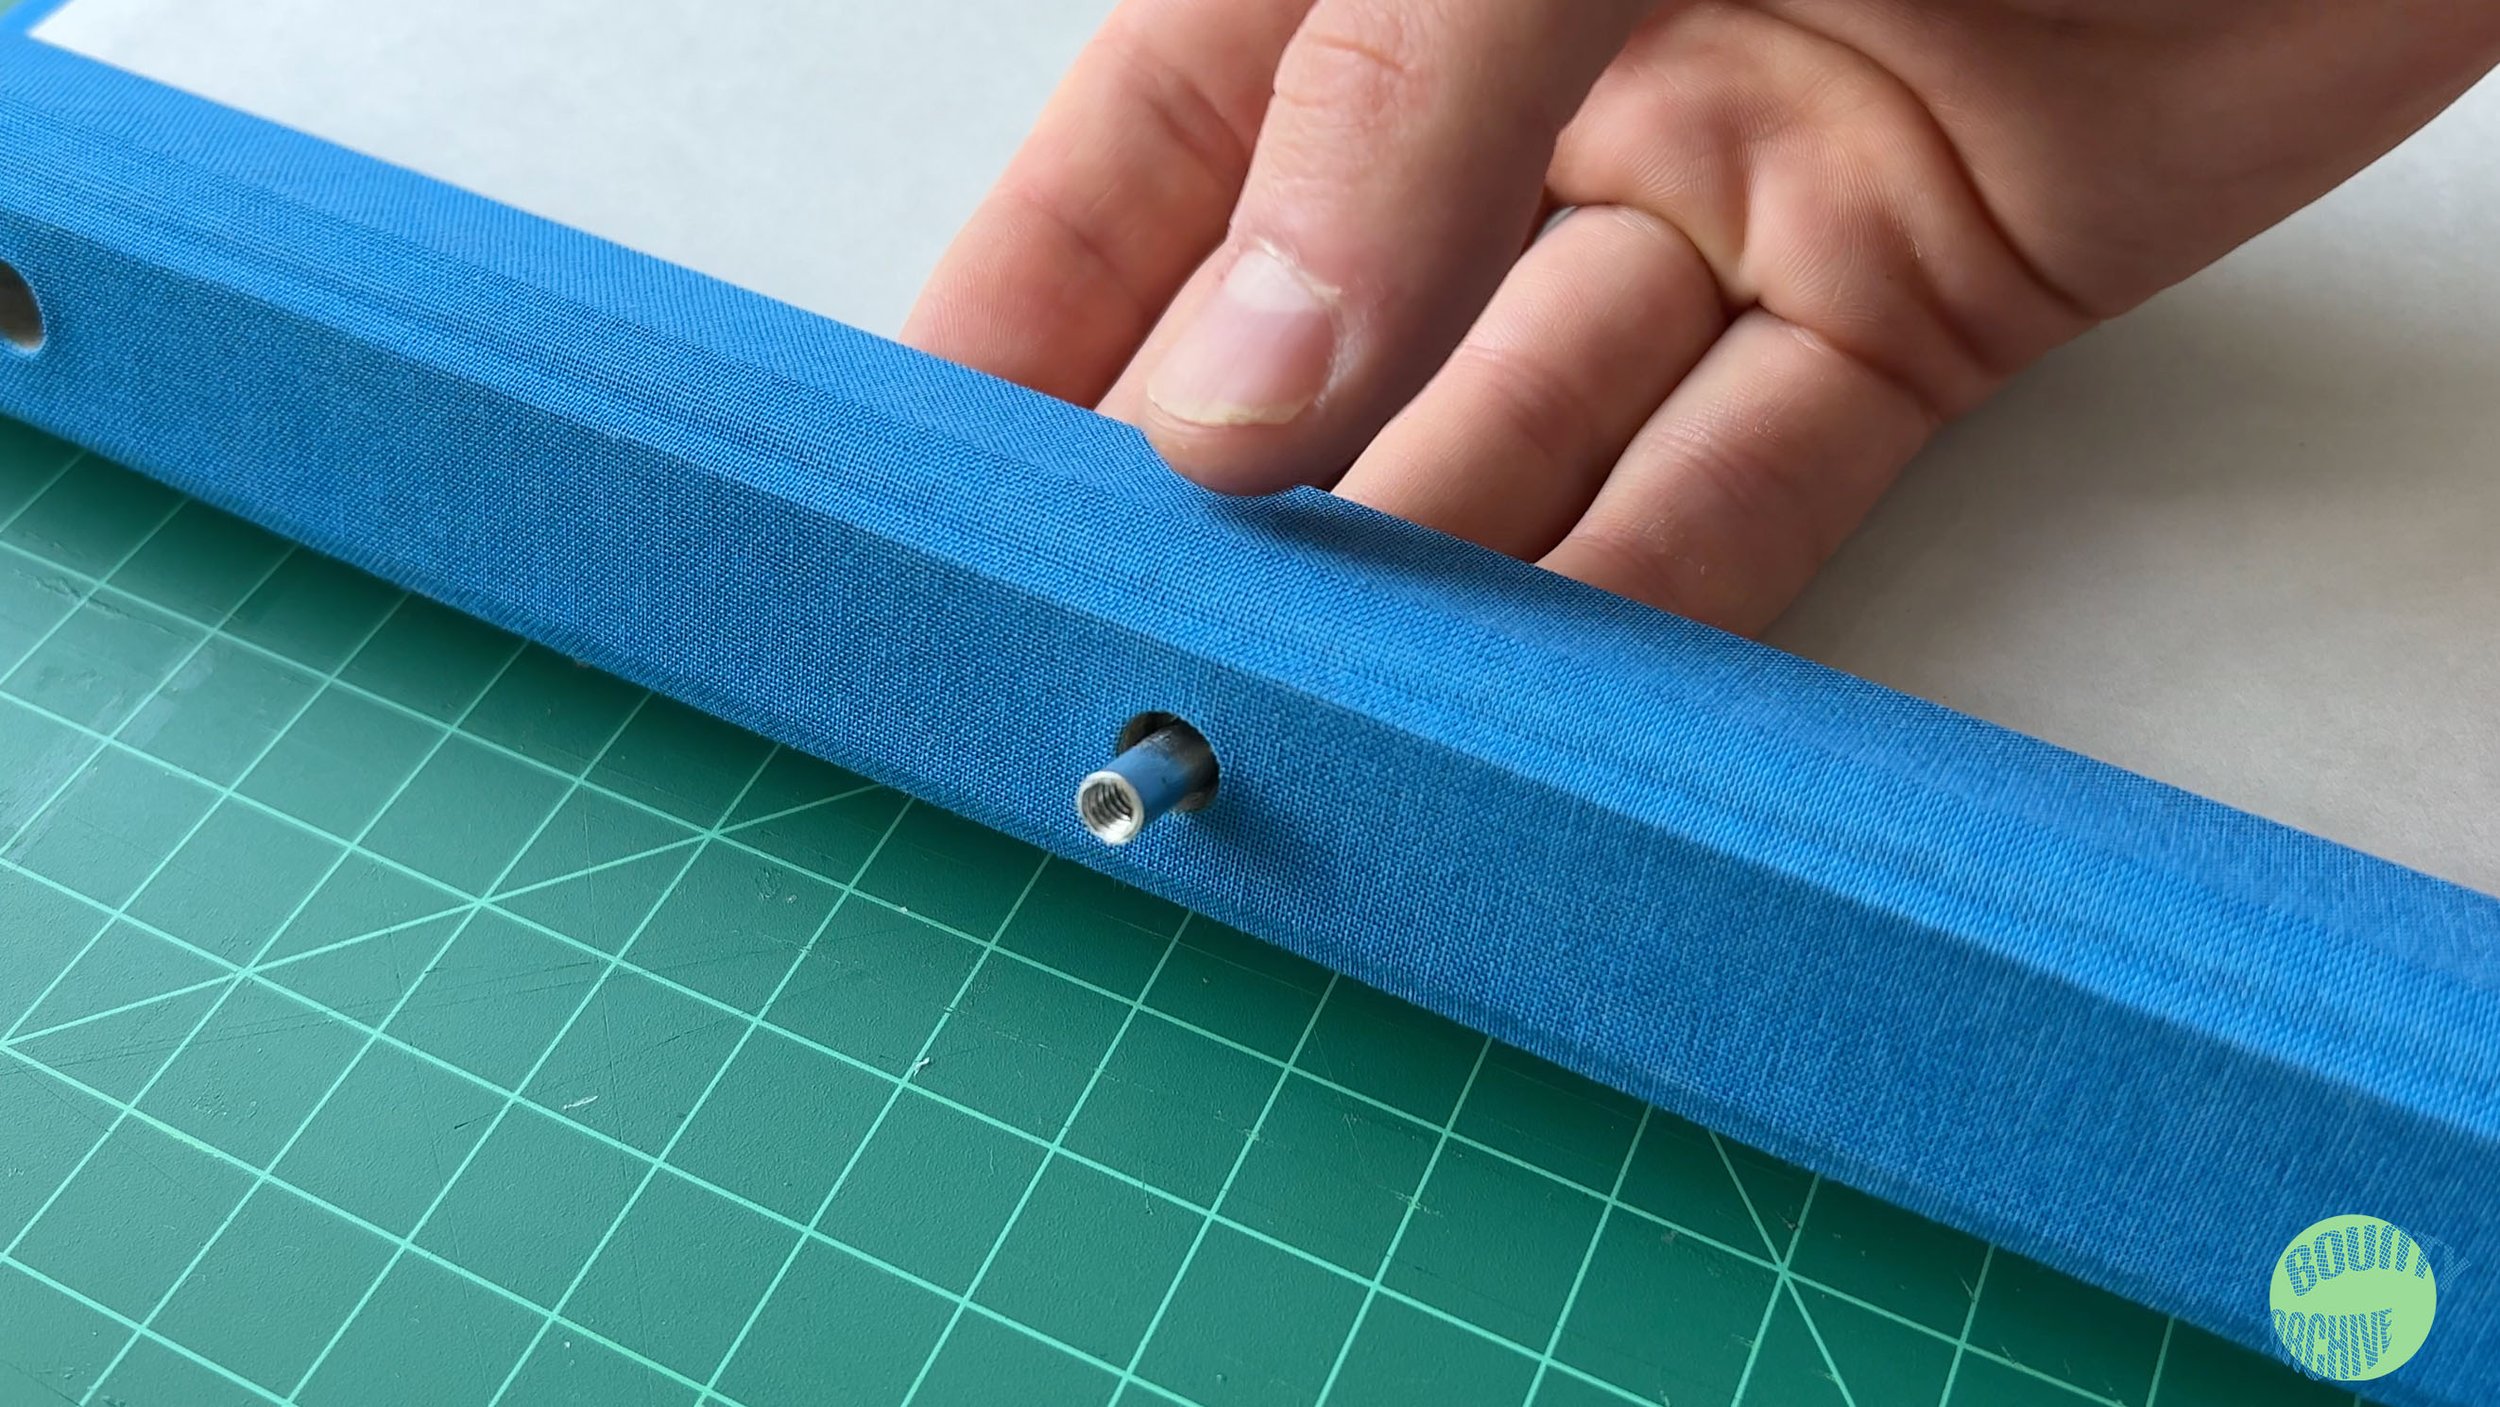
Following the marks, punch three holes in each cover, from the side with the bookcloth.
Step 5B: Breaking-in the Book and Final Assembly

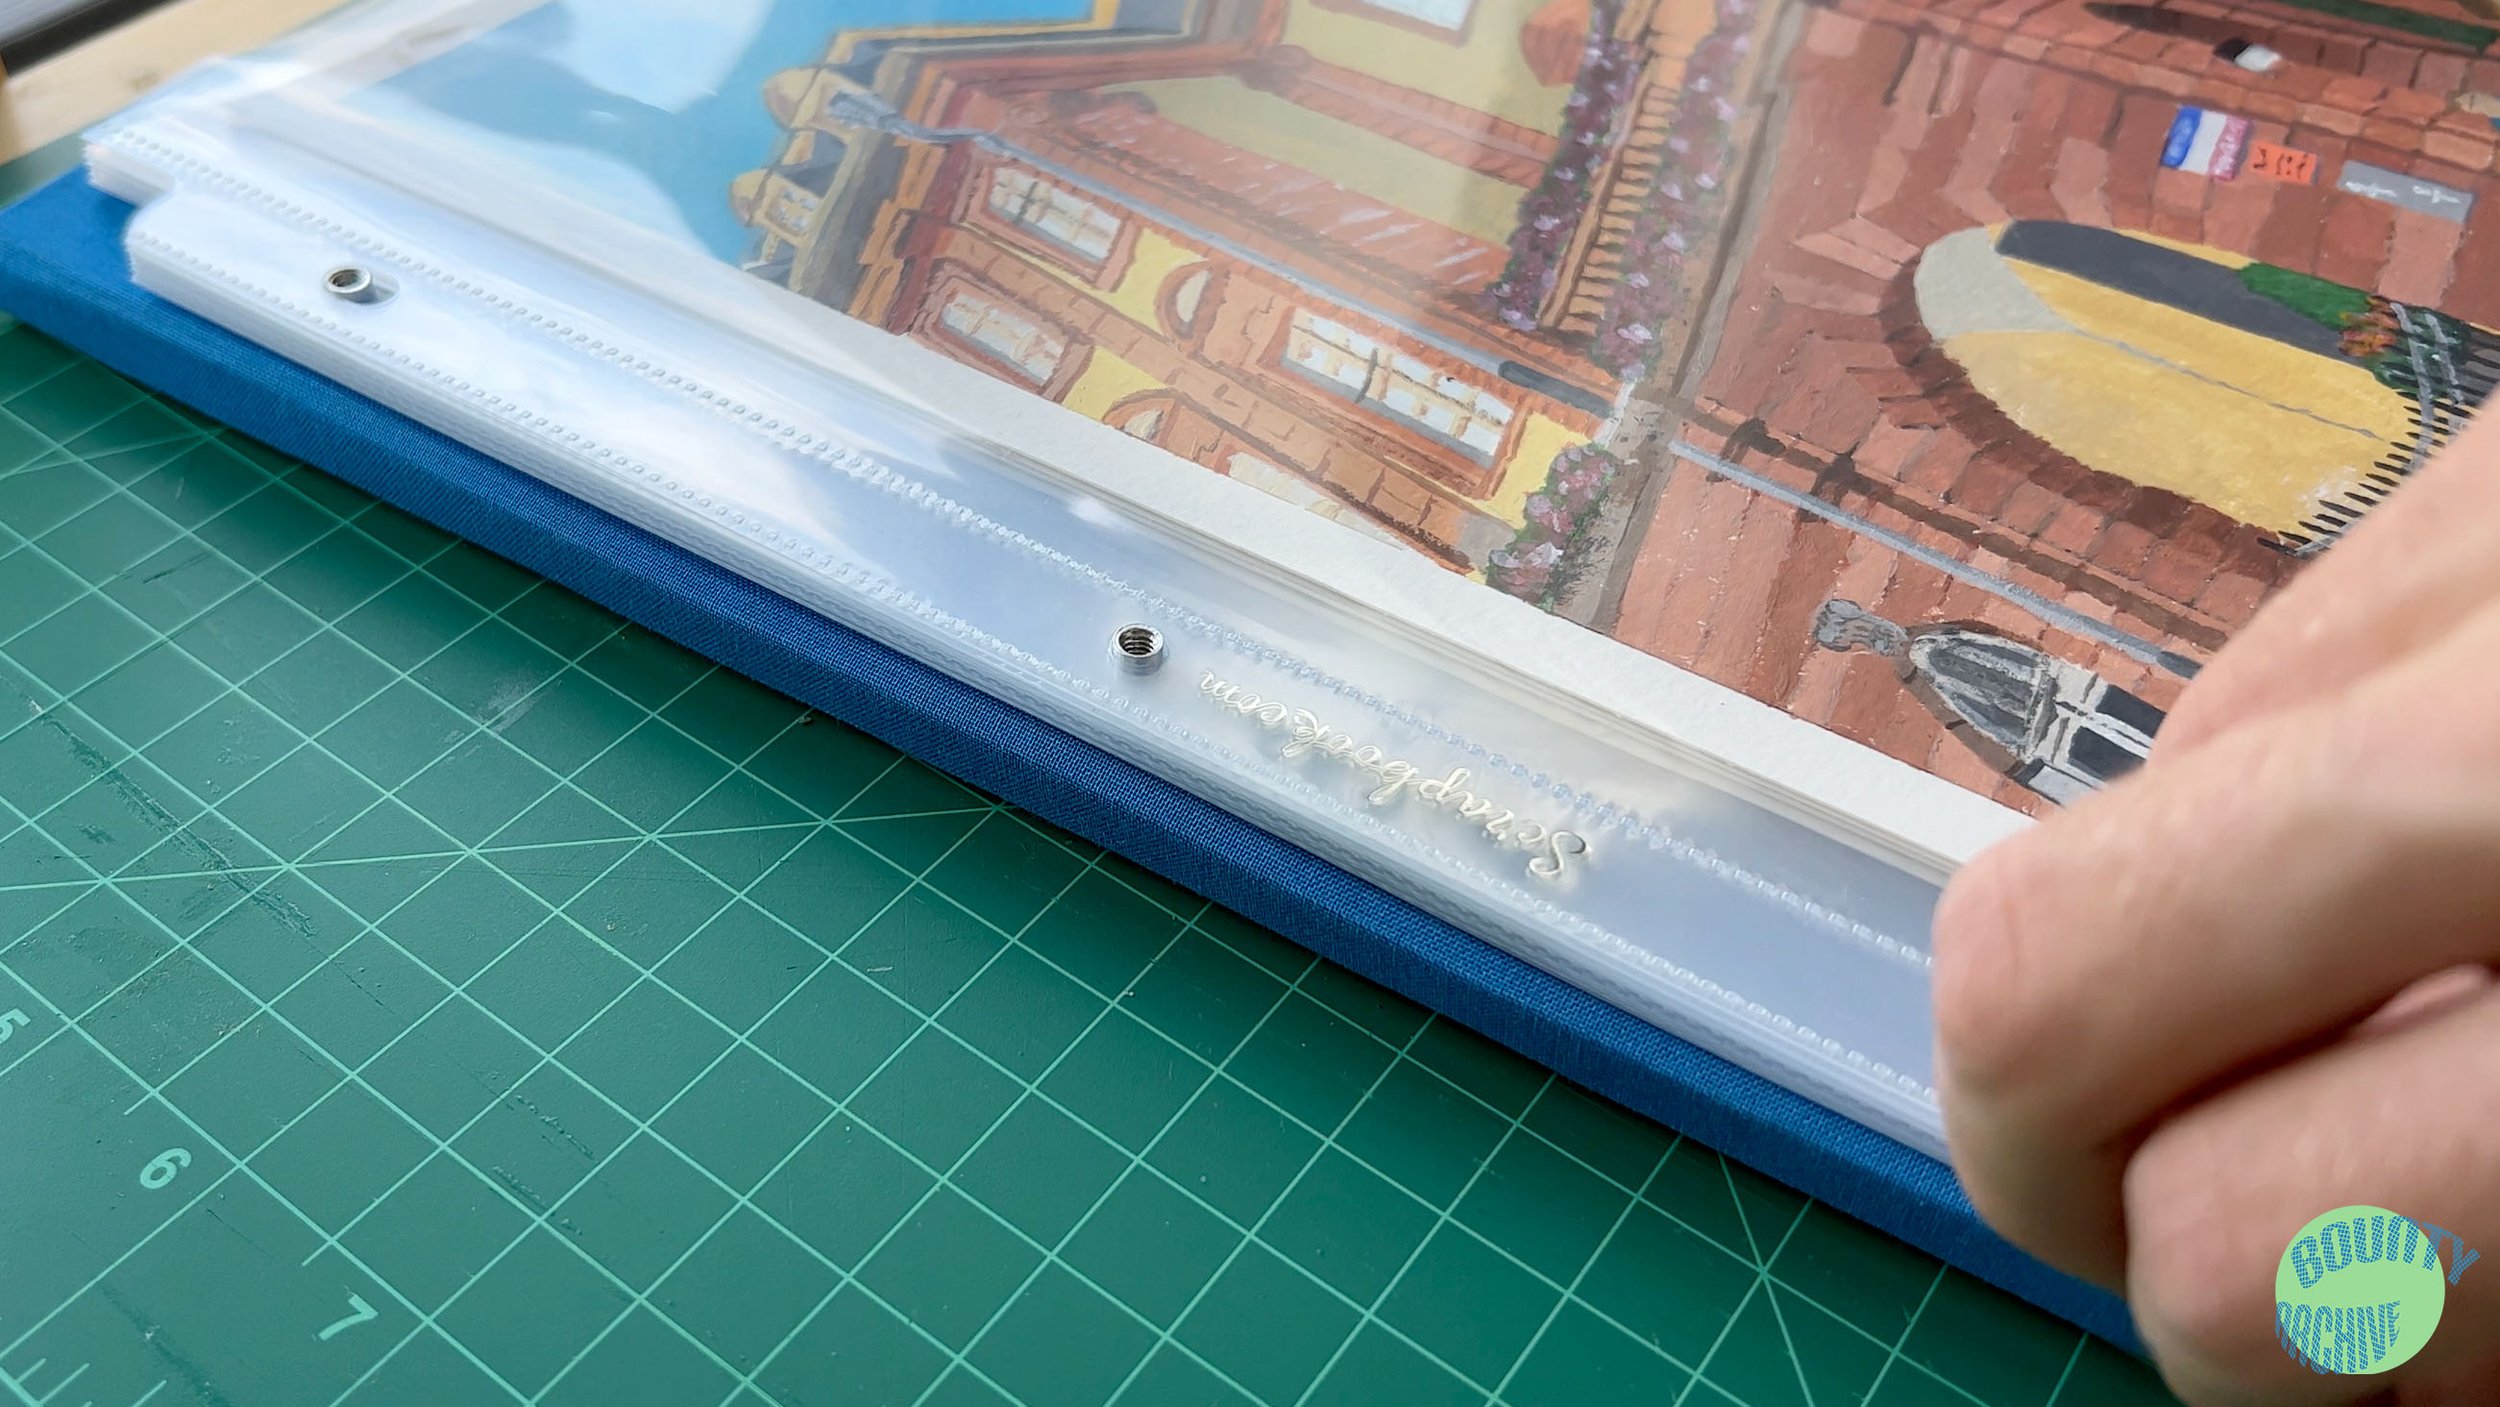
Once the binder is fully-assembled, all of the joints may be stiff. This can be remedied by folding all of the joints back and forth to “break-in” in the book.
Once broken-in, stack your slides onto the screw post, layer on the top cover, and screw it tight!
Please leave a comment if this guide was helpful.
If you have any questions about this process, materials, bookbinding, or otherwise, contact Bounty Archive Management.