How the belt is used
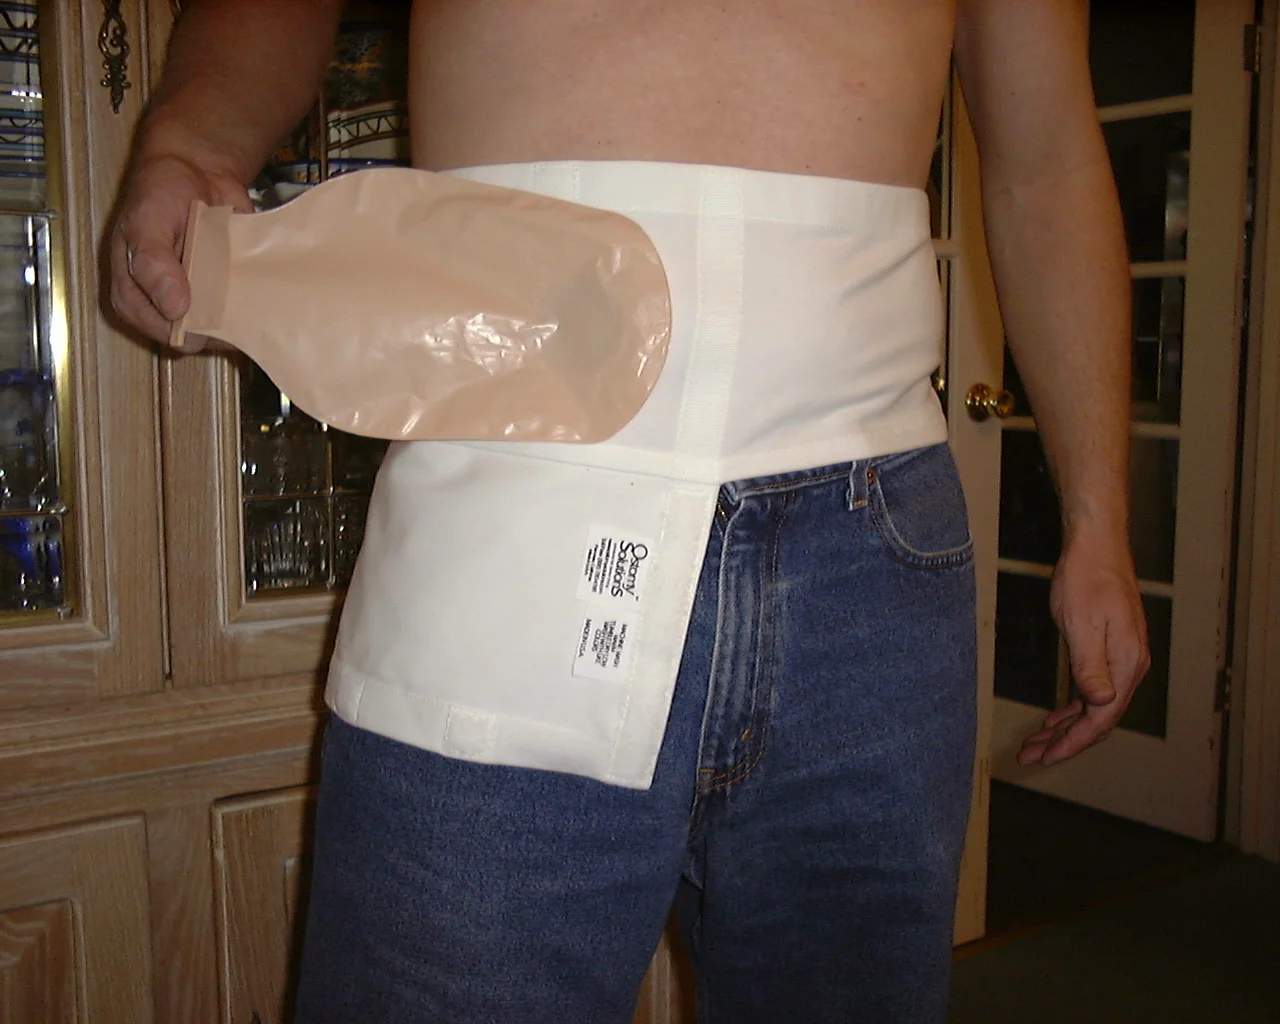
With your pouch attached in a sideways (horizontal) position you will step in to the belt and pull it up into position over your stoma. Open the flap securing the pocket area and let it hang down allowing free access to the inside of the pocket. Bring the tail end of your pouch through the hole on the inside of the belt pocket area which is over your stoma (and where your pouch is attached). Then simply arrange your pouch to fit within the pocket.
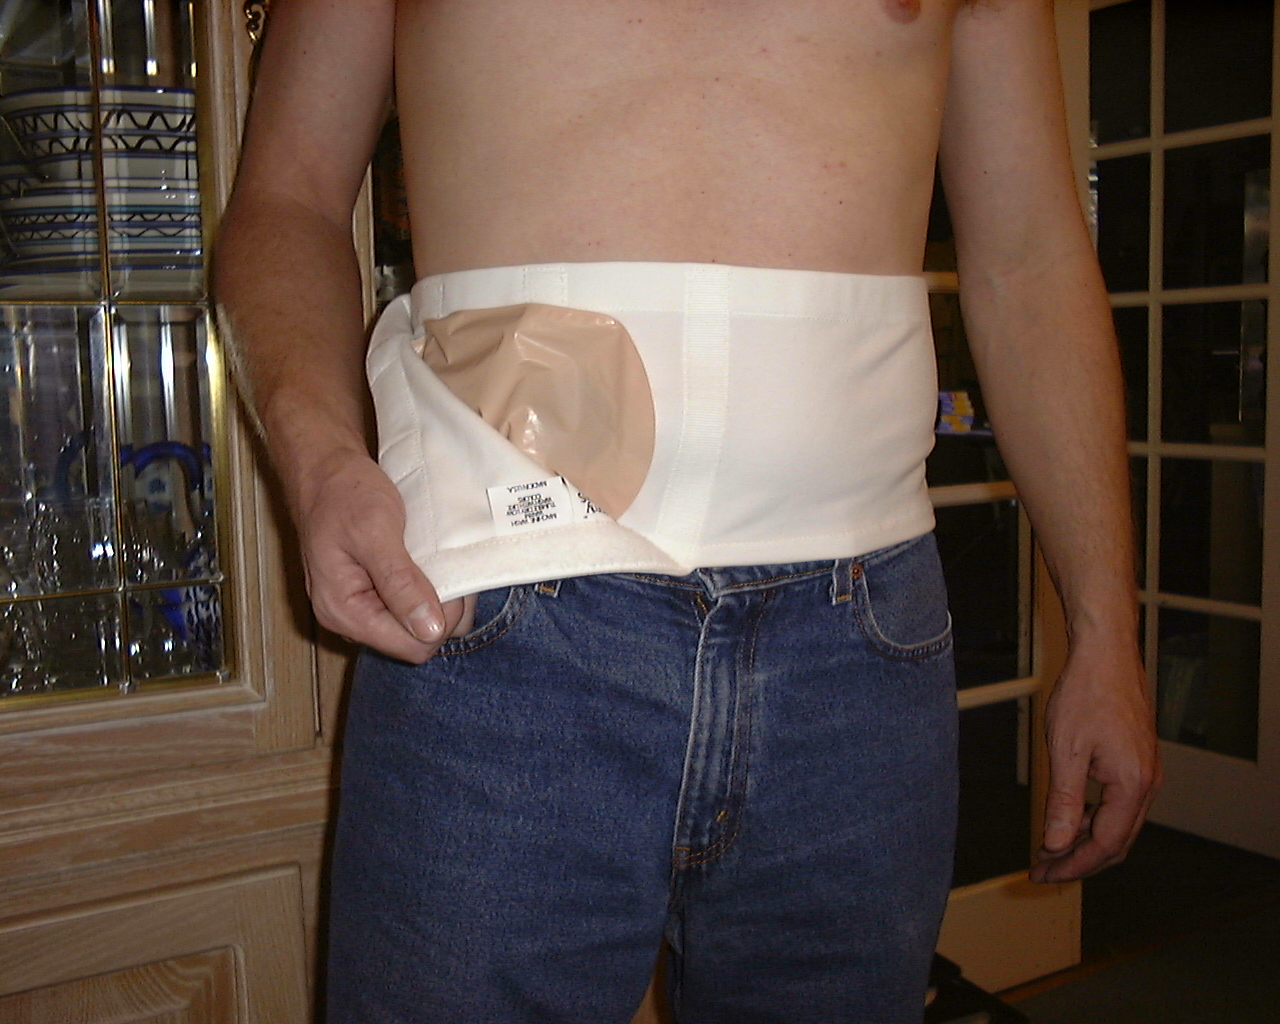
Now, close the pocket area by simply raising the flap, aligning the edges and pressing together the Velcro hook and loop closure. After you've put your belt on once or twice you'll discover that it's not really necessary to completely open the flap of the pocket area as shown in the first step. You will be able to pull your belt up in to position with the pocket only part way open then pull your pouch through and close the pouch in just a few seconds. As you notice in the picture this pouch is slightly larger than the pocket interior. It's not a concern, just move the pouch edge aside slightly as you secure the Velcro. The functionality of the belt is not affected.

It is not necessary to remove your Better Life Ostomy Belt when it is time to empty. Just partially open the pocket by peeling back the top corner enough that you can retrieve the tail end of your pouch to pull it out and point it downward. Let it hang down clear of the belt and empty as you normally do. You will find that the tail end of the pouch reaches down almost as far while emptying as it does when a pouch is attached in a vertical position.
That's it !
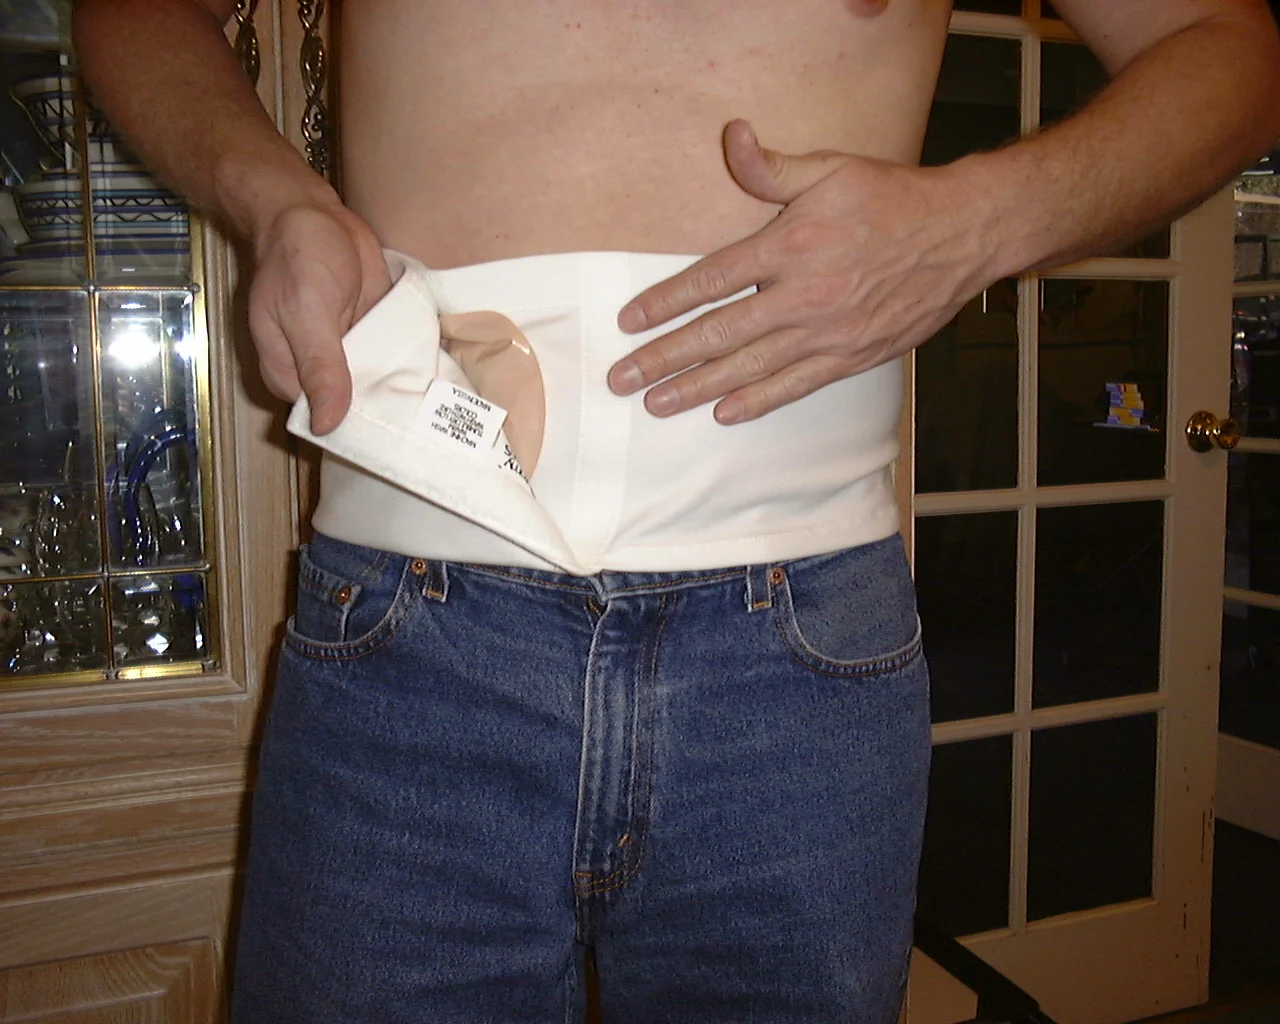
Tuck your pouch back into the pocket and press the flap closed. It couldn't be easier and only takes a few seconds. Note that it is not necessary to remove the belt to empty your pouch.